Browser Journey Deployment & Configuration
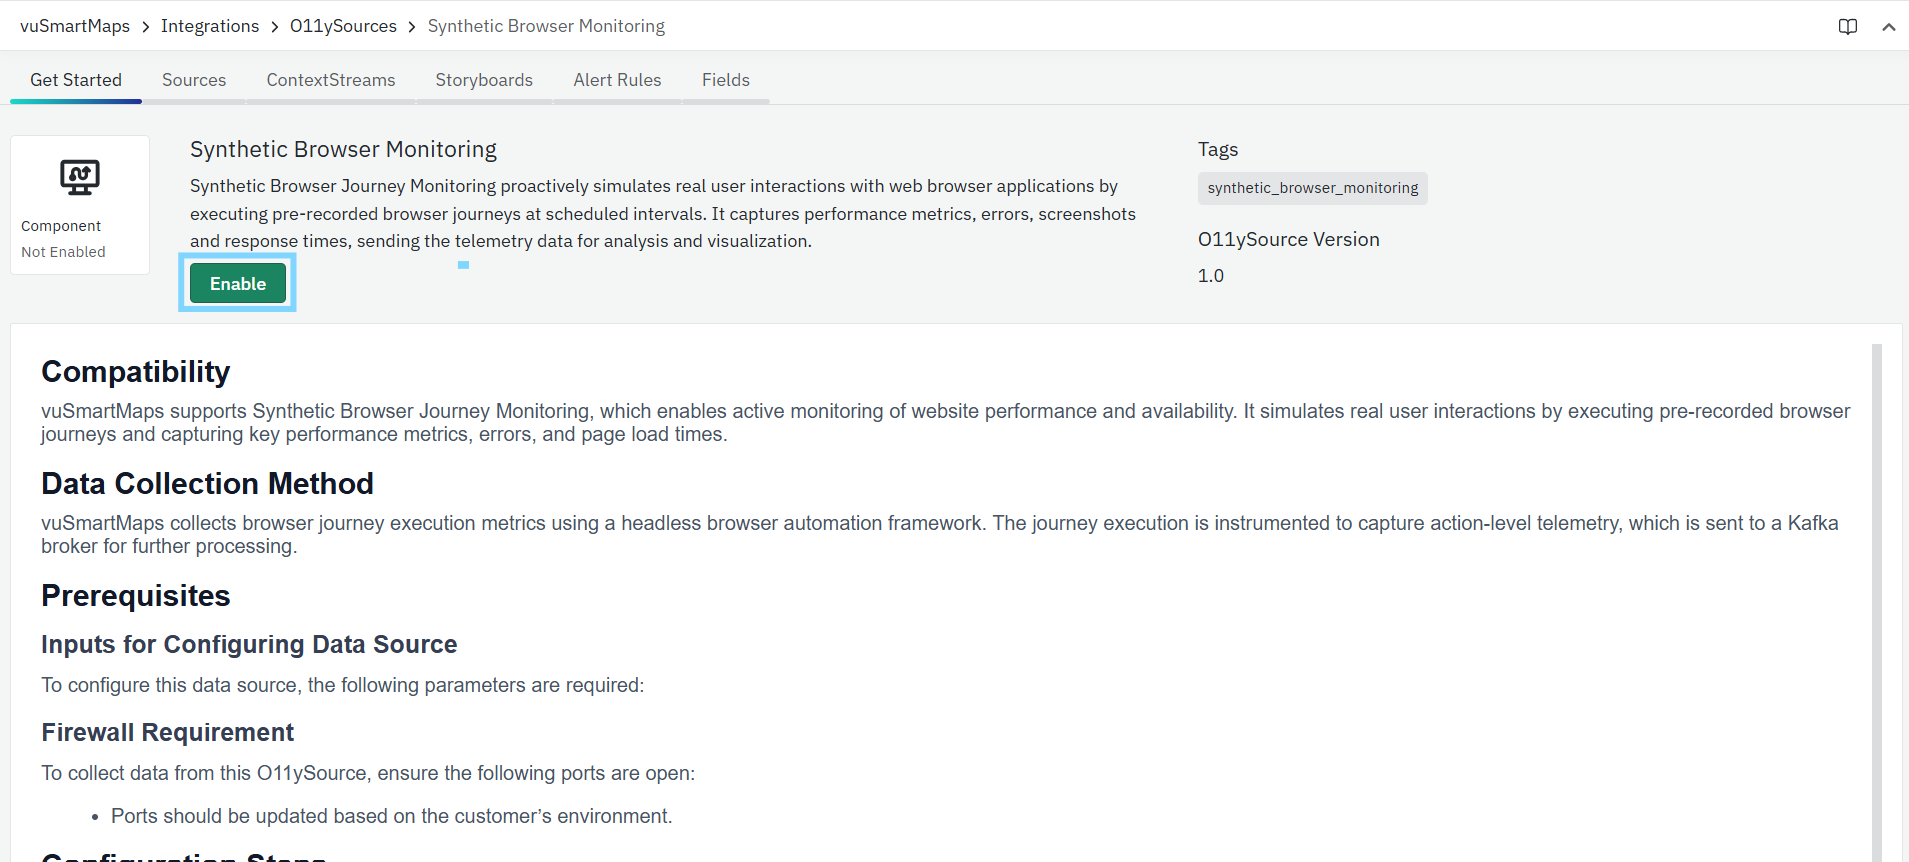
Achieve proactive web performance monitoring by integrating vuSyntheticBrJourney into the system. This feature simulates real user interactions by executing pre-recorded browser journeys and capturing performance metrics, errors, response times, and screenshots. The collected telemetry data is then processed and visualized within vuSmartMaps, ensuring continuous tracking of web application performance.
vuSmartMaps Configuration: Enabling vuSyntheticBrJourney
Enabling Browser RUM O11ySource
-
Navigate to O11ySources:
- vuSmartMaps O11ySources can be accessed by navigating from the left navigation menu (Integrations > O11ySources).
-
Locate Synthetic Browser Monitoring O11ySource on the landing page.
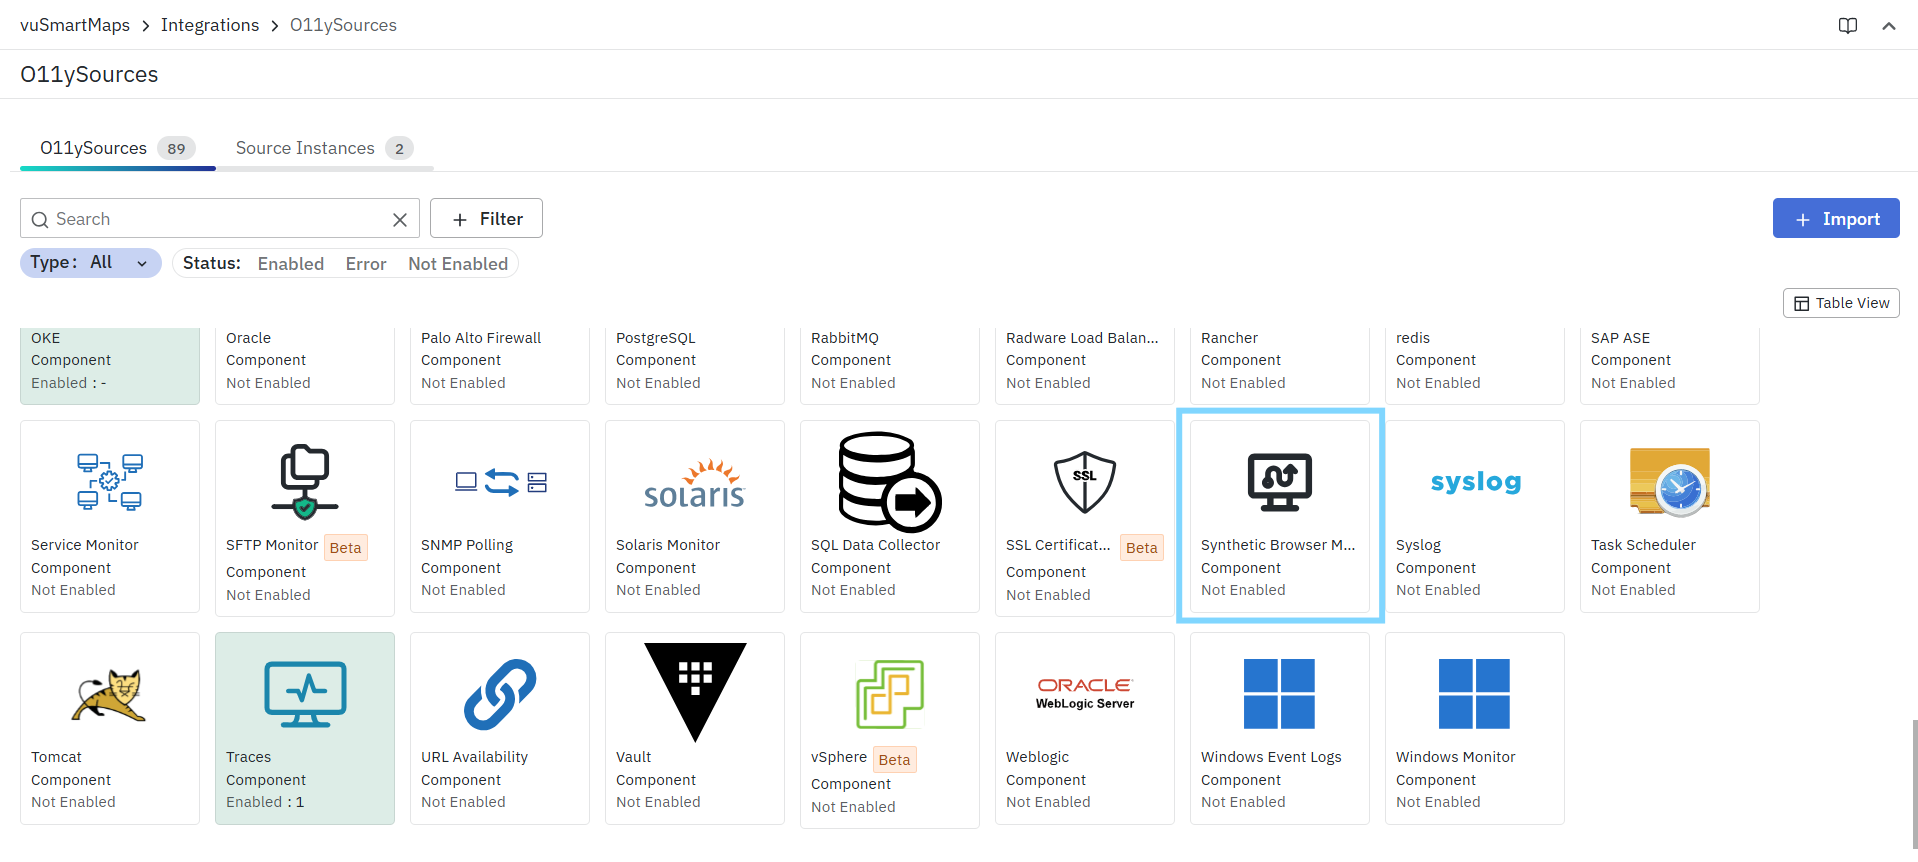
- Enable vuSyntheticBrJourney O11ySources:
- Click the Enable button to activate vuSyntheticBrJourney O11ySource.
Data Collection and Processing
vuSmartMaps collects browser journey execution metrics using a headless browser automation framework. Each journey execution is instrumented to capture action-level telemetry, which is then sent to a Kafka broker for further processing.
Prerequisites
Inputs for Configuring Data Source: To configure the data source, the following parameters are required:
- Host - The IP Address/FQDN of the network devices.
Firewall Requirement: To collect data from this O11ySource, ensure the necessary ports are open.
Ports should be updated based on the customer’s environment.
Configuring Data Sources
To add and configure a Synthetic Browser Journey data source:
- To add and configure a Synthetic Browser Journey data source: Go to the Sources tab inside the Synthetic Browser Journey O11ySource. Click Source (top-right) → Configure New.

-
This opens the Configure New Data Source(s) wizard, which includes:
Step 1: Add Data Source
In this step, you provide the basic details required for Synthetic Browser Journey monitoring.
Fill in the following fields:
- Host – Enter the IP address or FQDN of the system where the Synthetic Browser Journey recorder will be installed and executed. This value uniquely identifies the source.
- AWB Applications – Select the appropriate AWB application from the dropdown list that corresponds to this host. This links the synthetic journey to the correct application context.
After entering the required details, click Proceed to continue.
Step 2: Configuration Setup
In this step, you define how the data source will be managed by the platform. The table lists the added source and shows:
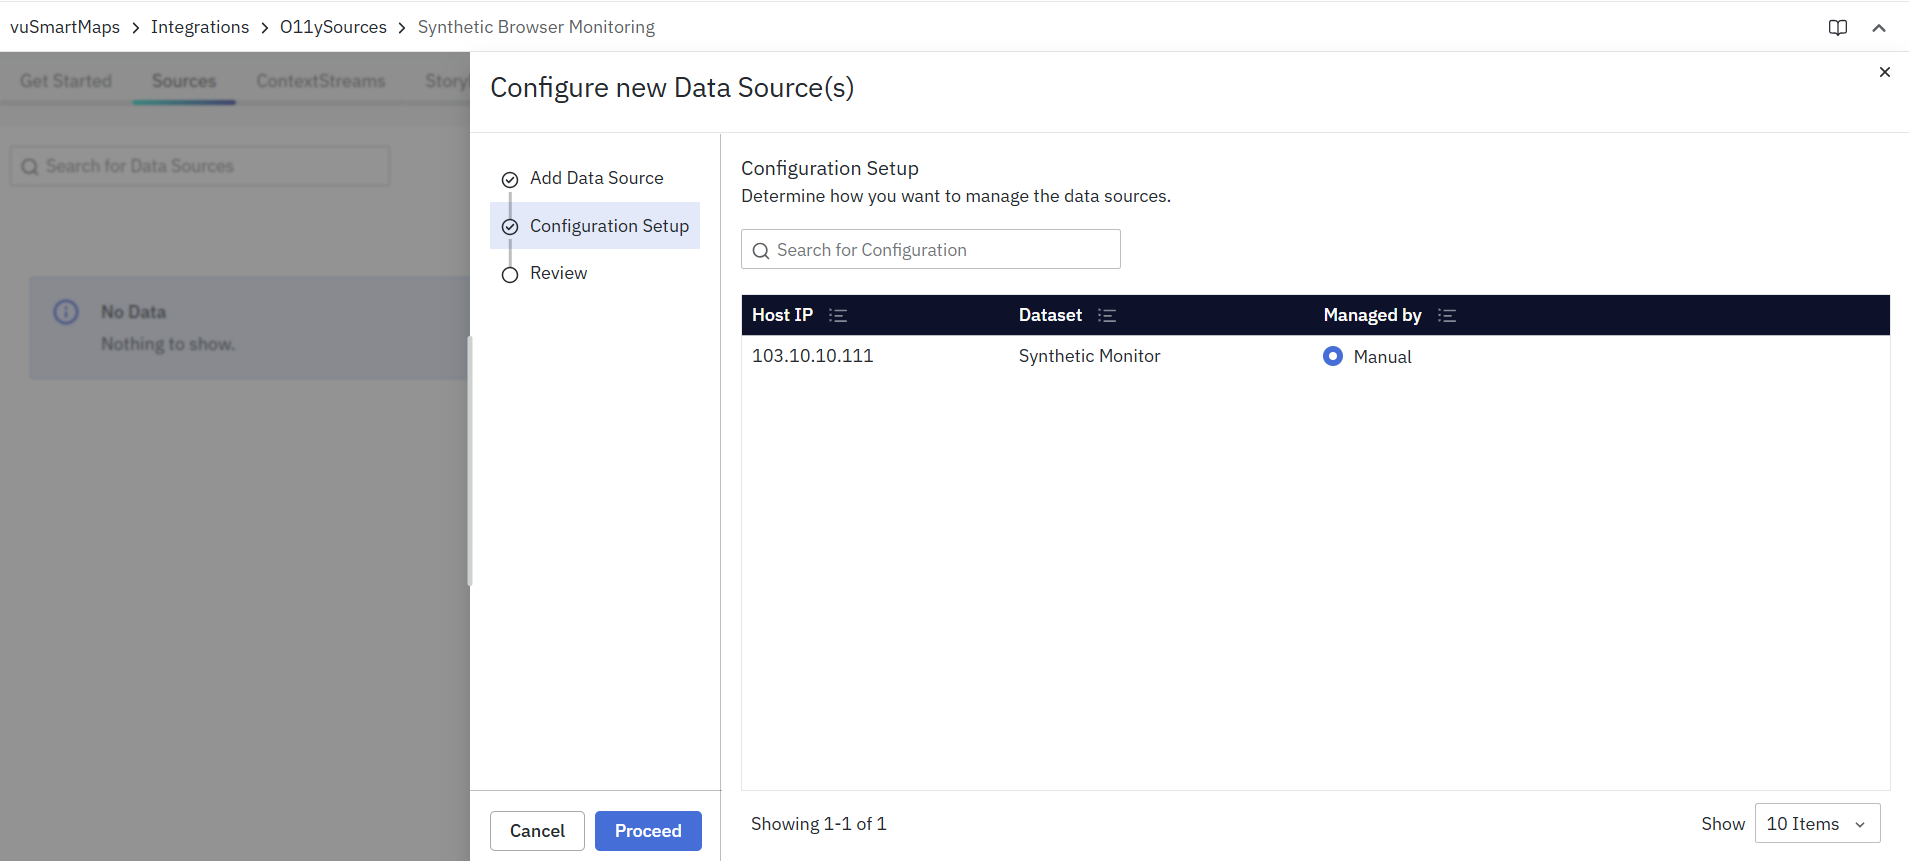
- Host / Group Name – The host identifier you entered.
- Dataset – Set automatically to Synthetic Browser Journey.
- Managed By – Indicates how data collection for the source is managed. Based on the O11ySource type, one or more management modes may be available. Only the supported modes are shown.
Management Modes
- OmniAgent Managed – Data collection is handled automatically by OmniAgent. Once the agent is discovered on the host, data collection starts. Until discovery, the source remains in a Pending state.
- Manually Managed – The user manages data collection manually by downloading and deploying the required recorder package and configuration files.
- You must download the Synthetic Browser Journey recorder package.
- Deployment and execution are done manually on the host.
- Data collection starts once the recorder is running successfully.
Refer to the Download Source section for setup details.
- Remote Collection – Data is collected remotely without installing OmniAgent on the host, using configured connectivity and credentials where applicable.
After selecting the applicable management mode, click Proceed.
Step 3: Review
The Review step shows a summary of the configuration before completing the data source setup. This allows you to verify that the correct settings and management type are applied.
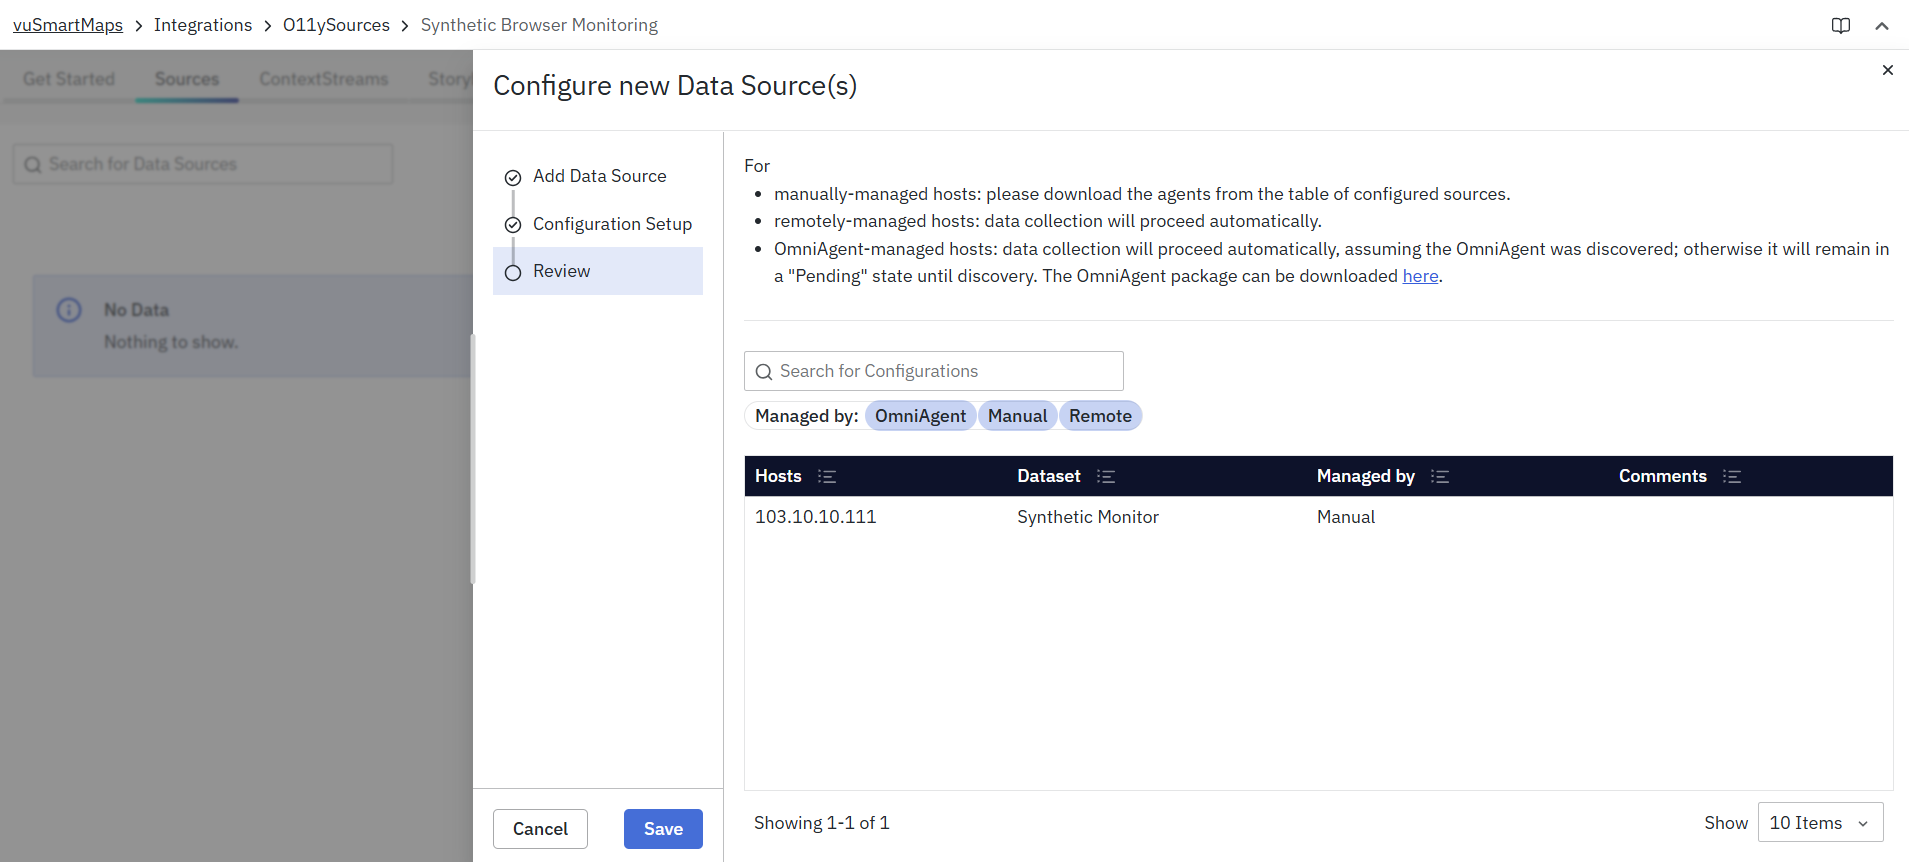
The summary includes:
- Host and dataset details
- Selected management mode
- Number of sources being added
Guidance based on the management type:
- Manually Managed – Download and deploy the required recorder package after setup.
- Remote Collection – Data collection starts automatically once configuration is applied.
- OmniAgent Managed – Data collection begins when OmniAgent is detected; until then, the source remains Pending.
Once everything is verified, click Finish. The Synthetic Browser Journey source will now appear in the Sources list.
Download Source
If the data source uses Manually Managed mode, you must download the required recorder package. To download:
- Go to the Sources table.
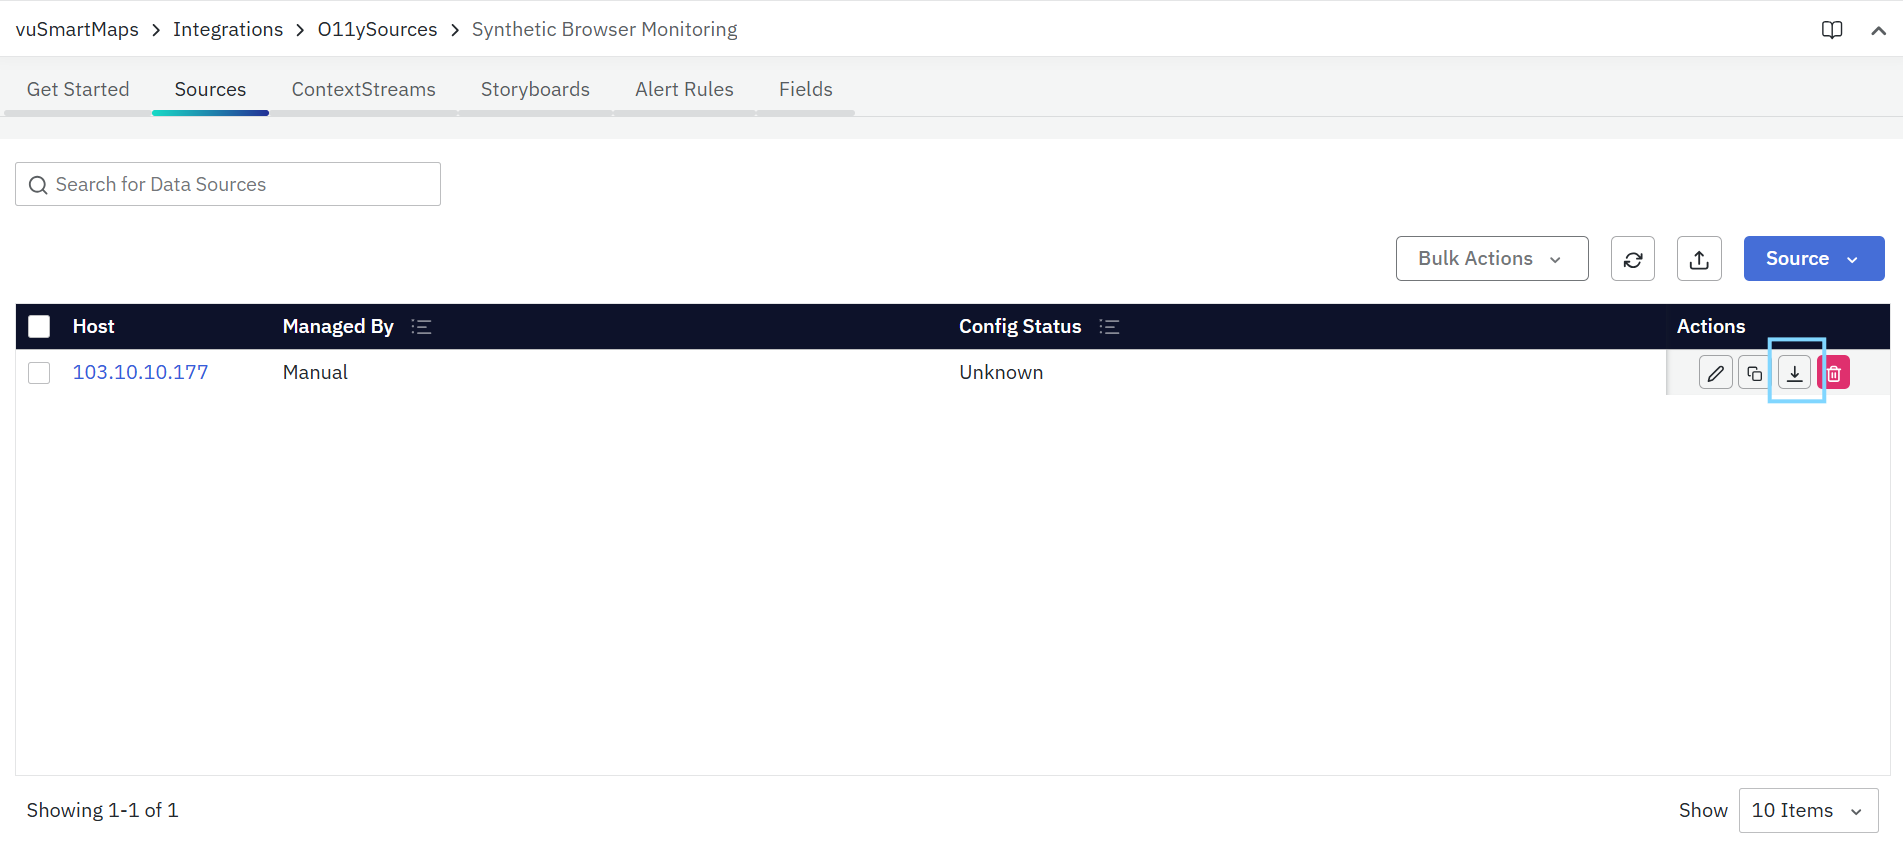
- Click the Download icon in the Actions column.
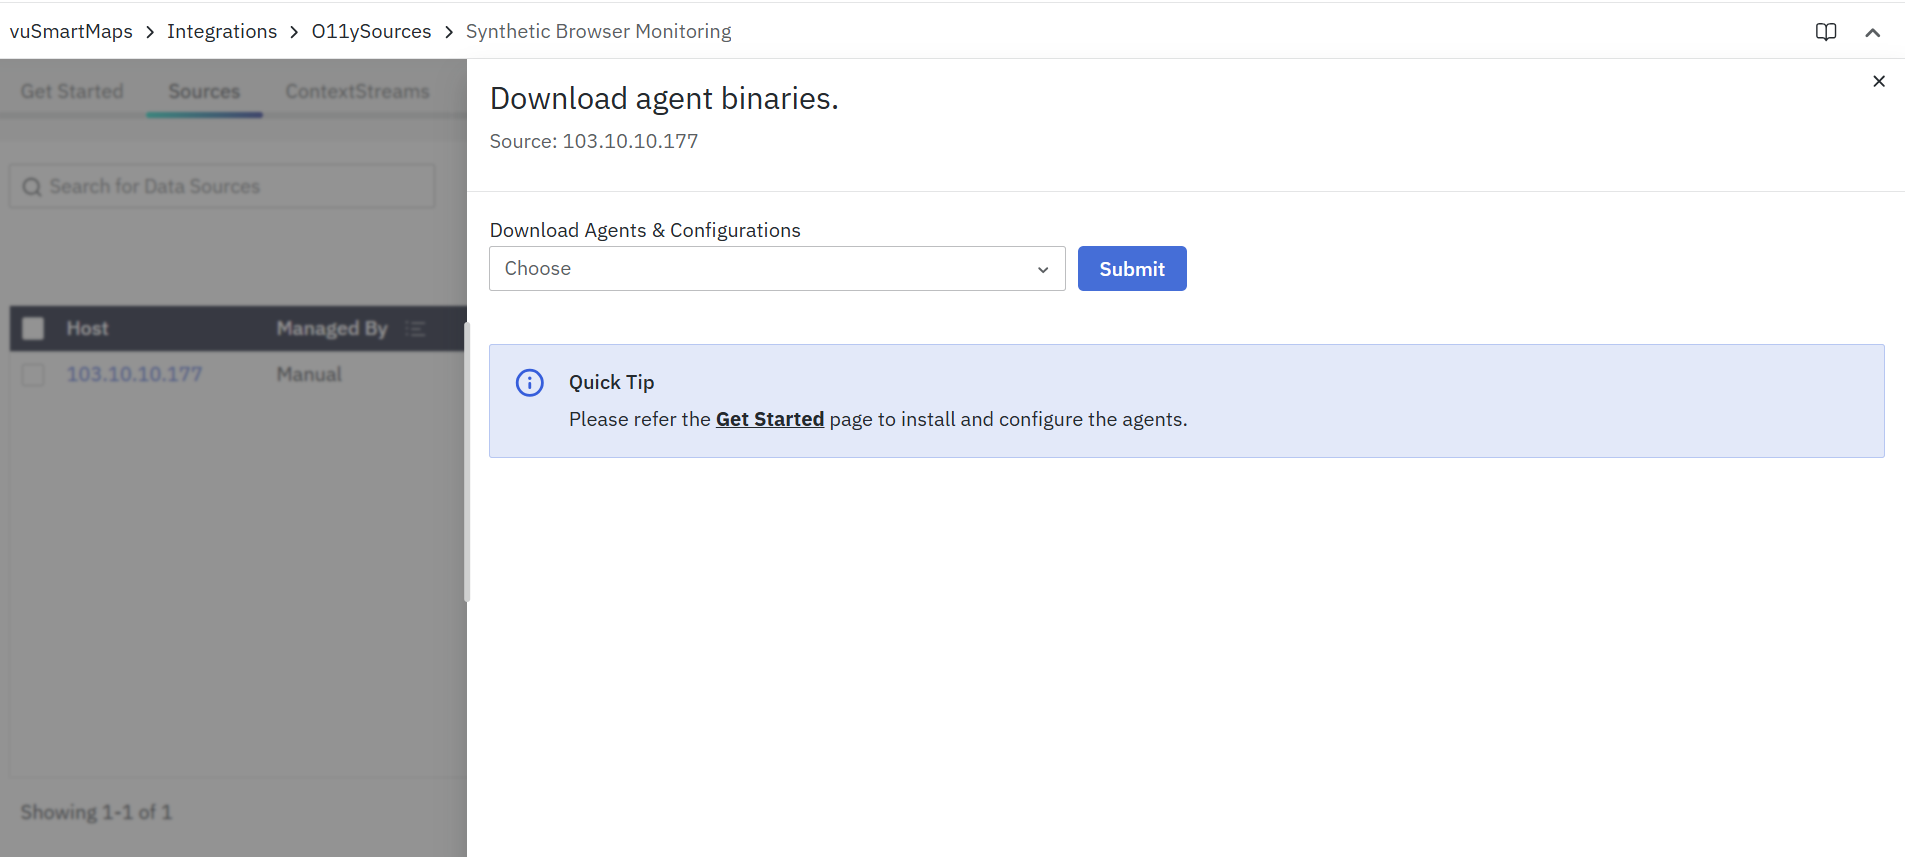
- Select the required configuration.
- Click Submit.
This provides the Synthetic Browser Journey recorder package and configuration files needed for manual setup.
Follow the instructions provided in the Steps to Run the Synthetic browser Journey Recorder.
Steps to Run the Synthetic Browser Journey Recorder
The Synthetic Browser Journey Recorder enables users to simulate real browser interactions, capturing journey execution metrics for analysis. Follow the steps below to download, configure, and execute the journey recorder.
Step 1: Download the Recorder Binary
Obtain the recorder package (recorder.zip) from the provided source. This package contains the necessary files to record and execute browser journeys.
Step 2: Extract the Package
Unzip the recorder.zip file to extract its contents. Ensure that all files are extracted properly to avoid execution issues.
Step 3: Navigate to the Recorder Directory
Once extracted, open Command Prompt (cmd) and navigate to the extracted folder using the following command:
cd <path-to-foldername>
Replace <path-to-foldername> with the actual directory path where the recorder files are located.
Step 4: Run the Recorder Batch File
Execute the following command to start recording a browser journey:
<Batchfile> -n "<JourneyName>" -u "<PageURLtoLoad>"
<Batchfile>– The name of the batch file used to run the recorder (found in the extracted folder).<JourneyName>– Specify a name for the journey being recorded.<PageURLtoLoad>– Enter the website URL to be monitored during the synthetic journey.
Step 5: Start Recording
After executing the command, the recorder will launch a browser instance with the specified URL. Users can interact with the webpage, simulating real user actions, such as clicking links, filling forms, or navigating between pages.
Step 6: Complete and Save the Journey
Once all necessary interactions have been performed, close the browser to complete the recording.
- The recorded journey file will be automatically saved in the scripts folder.
- The filename will match the Journey Name specified in Step 4.
Step 7: Send the Recorded Journey File
To proceed with deployment and execution, the recorded journey file must be manually shared with the CSG team for further processing.
