Creating Your First Application
Step 1: Starting the Creation Process
Click the + Application button in the top-right corner. You'll enter a three-step process:
- General Info: Basic application details, including mapping the application to its environment
- Sources: Add and map monitoring components to the application
- Review: Verify and save
All steps are required before you can save.
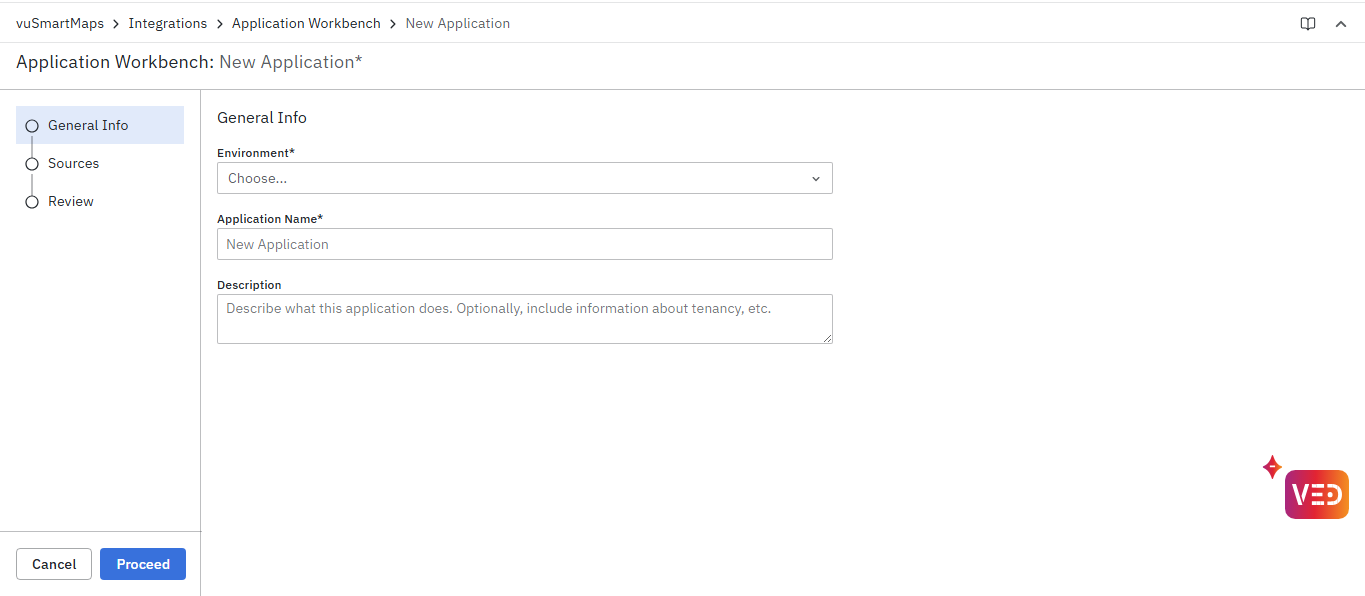
Step 2: Fill in General Information
The first step asks for core details about your application.
Environment (Required)
- Select from the dropdown where this application runs
- Common choices:
- Production (live, customer-facing)
- User Acceptance Testing, i.e., testing before release
- DR (disaster recovery)
- Dev (development/testing)
- Why it matters: Helps organize your applications by deployment stage and prevents accidentally mixing production and test data
The list of environments available in this dropdown is currently configured at the backend. Currently, users cannot create or modify environments in the Application Workbench UI. Support for managing environments (CRUD operations) directly from the UI is planned and tracked in the backlog.
Application Name (Required)
- Choose something descriptive that your entire team will recognize
- Examples: "Customer Portal", "Payment Gateway", "Inventory System", "Fraud Detection Engine"
- Important: Application names must be unique—no two applications can have the same name
- If you try to use a duplicate name, the system will alert you
Description (Optional but Recommended)
- Write a brief explanation of what this application does
- Include business context or tenancy information if relevant
- Examples:
- "Core payment processing system handling all UPI transactions"
- "Internal analytics dashboard for sales team, runs on shared infrastructure."
- "Customer data management portal, PII handling required."
- This helps your team understand purpose at a glance
Step 3: Add Sources (The Core of Application Workbench)
This is where you map all the technologies that make your application work.
Understanding O11ySources and Source Instances
What is an O11ySource?
An O11ySource is a monitoring agent or integration that collects data from your infrastructure. Examples include:
- Linux Monitor (collects metrics from Linux servers)
- Apache (monitors Apache web servers)
- MongoDB (monitors MongoDB databases)
- Nginx (monitors Nginx servers)
Source Instances
Source instances are the actual assets that are configured to be monitored, such as servers, databases, or services. After an O11ySource (monitoring integration) is set up, users add and configure the source instances that need to be monitored by that O11ySource.
Example:
- O11ySource Type: "Linux Monitor"
- Source Instances: "10.0.0.213", "10.0.0.214", "10.0.0.215" (three different servers)
For detailed information on setting up O11ySources and creating source instances, refer to O11ySources Documentation.
Understanding Sources
A "source" is any individual monitoring component:
- Databases: MongoDB, PostgreSQL, Oracle, MySQL
- Servers: Linux hosts, AIX systems, Windows machines
- Network Equipment: Cisco switches, routers, firewalls
- Application Servers: Tomcat, JBoss, WebLogic, Apache
- Monitoring Tools: Specialized monitoring solutions
- APIs and Services: Any instrumented component
Important: Setting Up O11ySources First
The source types you see here depend on O11ySources already being configured in your system. If you don't see the monitoring type you need:
- Option A: Add it directly in O11ySources
- Go to O11ySources (link to doc)
- Set up the new monitoring agent
- Return to Application Workbench—it will now appear in this dropdown
- Option B: Contact your infrastructure team
- They may need to deploy the monitoring agent first
Once the O11ySource type is configured, you can select it here and attach any instances of it to your application.
Example: "Linux Monitor", "Apache", "Redis"
Applications can also be mapped to monitoring sources directly from O11ySources. While adding or editing a source instance in O11ySources, you can associate it with one or more existing Application Workbench applications. Once mapped, the source instance automatically appears under the corresponding applications in Application Workbench.
Adding Your First Source
- Click the + Source button
- A modal dialog appears with three required dropdowns
Step 1: Select the O11ySource
- Choose the specific observability source for which you want to configure the alert.
- The dropdown displays all O11ySources available in the system, such as Linux Monitor, Apache, and Redis.
Step 2: Select Specific Source Instance
- After choosing the type, this dropdown populates with actual instances you're already monitoring
- Example: If you picked "Linux Monitor", you'll see actual server IP addresses like "10.0.0.213", "103.65.21.162"
- The system shows normalized identifiers (IPs, URLs, hostnames) for easy recognition
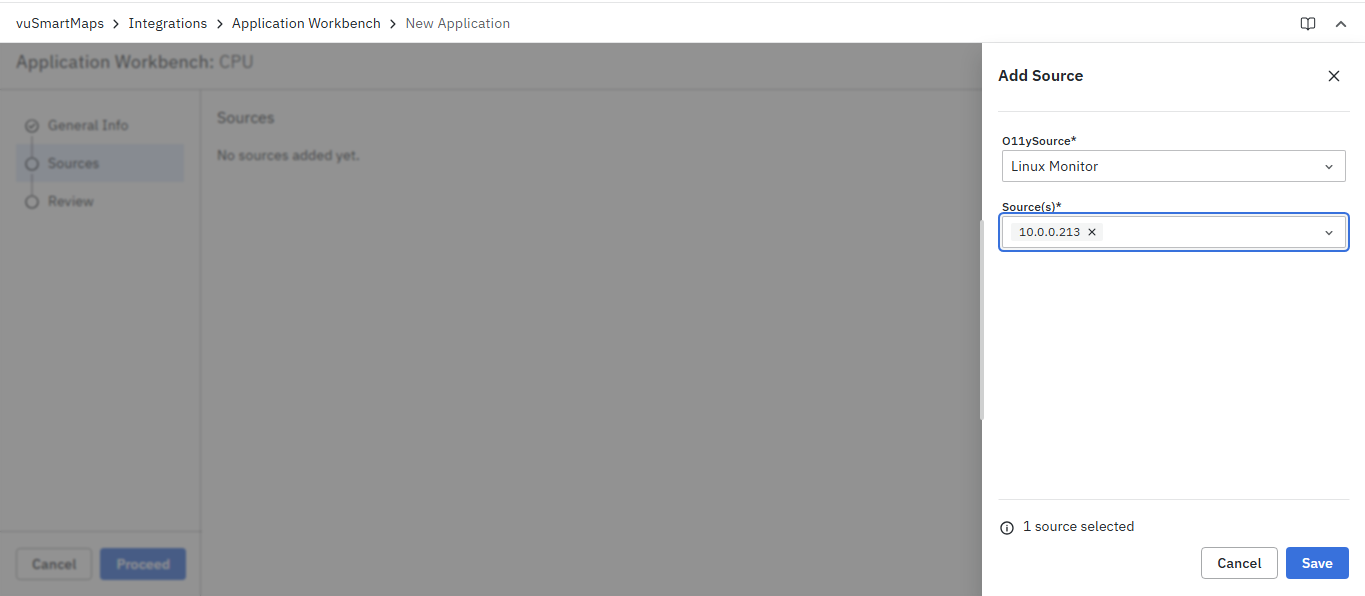
Step 3: Confirm and Save
- Click Save to add this source to your application
- The modal closes, and the source appears in your sources table
Adding Multiple Sources
Keep clicking + Source to add more components.
Real-World Example for a Payment System:
- First source: Linux Monitor → 10.0.0.213 (application server)
- Second source: MongoDB → mongo-prod-01.internal (primary database)
- Third source: MongoDB → mongo-prod-02.internal (backup database)
- Fourth source: Nginx → 103.65.21.162 (API gateway)
Each represents a piece of your application puzzle.
Common Use Cases and Examples
Payment System Example
A production payment system may include:
- Linux Monitor → Application servers
- MongoDB → Transaction database
- Nginx → API gateway
Grouping these under one application helps teams immediately understand payment impact during incidents.
Microservices Application Example
A microservices-based application might include:
- Multiple Linux or Kubernetes-monitored services
- Separate databases per service
- Shared API gateway
All related services are grouped into a single application to provide an end-to-end service view.
Database + API + Server Example
A simple backend application may consist of:
- Linux Monitor → Backend server
- PostgreSQL → Database
- Apache → REST API service
This setup is common for internal tools or admin portals.
Single VM Small Application Example
For small or legacy applications:
- One Linux server
- One application service is running on it
Even single-component applications can be modeled in AWB for consistency and future expansion.
Managing Sources
In the Sources section, you'll see a table showing all added sources:
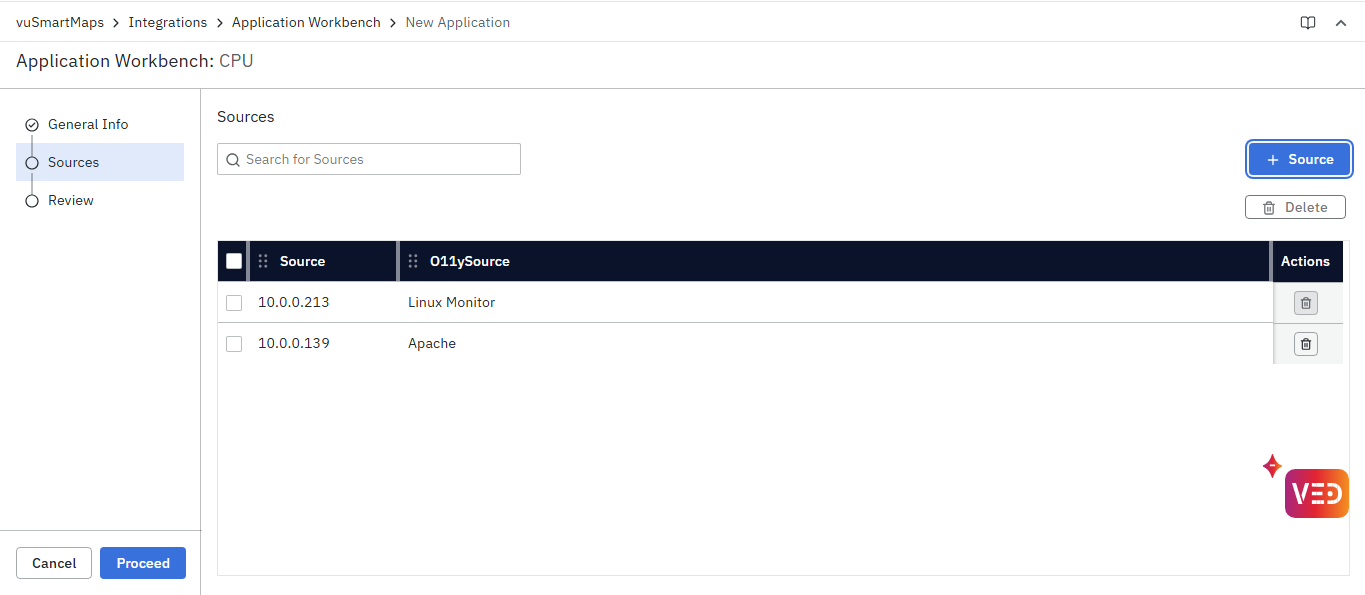
To remove a source: Click the delete (trash) icon next to it. You can always add it back later.
Step 4: Review Your Configuration
Before saving, you'll see a Review step showing:
- General Info: Application name, environment, description
- Sources: Complete list of all connected components
- All details for final verification
Double-check:
- Application name is correct and unique
- Environment matches where this application actually runs
- All necessary sources are included
- No extra sources that don't belong
Once you're satisfied, click Save to create your application.
What Happens After Saving
After an application is created:
- The application appears in the Application Workbench list.
- Attached source instances become associated with the application.
- Application ownership and environment details become visible to platform users.
- Application mappings can be used for impact analysis and troubleshooting.
- Changes made from O11ySources automatically synchronize with Application Workbench.
- Future monitoring activities can be viewed in the context of the application rather than individual resources.
FAQs
Can I create an application without adding sources?
No. Adding at least one source is mandatory to create and save an application.
Can the same source instance be attached to multiple applications?
Yes. A single source instance can be associated with multiple applications if it supports more than one business function.
