Deployment and Installation using vuLauncher
Introduction
vuLauncher is a standalone application designed to facilitate the deployment of vuSmartMaps™. The application operates via a command-line interface (CLI) and supports installation in two distinct environments:
- Virtual Machines: vuSmartMaps can be installed on virtual machines running any of the supported operating systems. The vuLauncher installs the base Kubernetes platform using the kubeadm provider, followed by the deployment of the vuSmartMaps application.
- Managed Kubernetes: vuSmartMaps can also be deployed on managed Kubernetes infrastructures, such as Amazon EKS, Azure AKS, Google GKE, OpenShift, and more. Refer the Managed k8s Deployment guide for more details
Deployment prerequisites document can be found here. Do not start the deployment until all the pre-requisites are in place. The vuLauncher installer will run pre-flights in the beginning to validate the readiness of the nodes for installation. If one or more nodes are not ready, the installation will not start.
Deployment Specification (D-spec)
The d-spec is unique to each environment and client installation. The installer utility “vuLauncher” uses the d-spec to drive the deployment of vuSmartMaps on the infrastructure provisioned on the target environment. It provides control over resource limits for services, service grouping across nodes, and additional configurations.
D-Specs can be generated from the D-Spec utility of the vuSizer tool available here.
Downloading the binary
- Create a folder in the home directory and download the NG vuSmartMaps installation binary using the below command
- wget https://download.vunetsystems.com/blob/3.2/vuSmartMaps_offline_NG-3.2.tar.gz - - user=<username> - - password=<password> - - no-check-certificate
- Also, Download the vuKube Bundle as per the OS and keep it under the same path.
- https://download.vunetsystems.com/_Downloads_/_vuDocker_/blob/vuKube/1.35.4/vuKube-k8s1.35.4-cis1.12-rhel-10-amd64.tar.gz
- https://download.vunetsystems.com/_Downloads_/_vuDocker_/blob/vuKube/1.35.4/vuKube-k8s1.35.4-cis1.12-rhel-9-amd64.tar.gz
- https://download.vunetsystems.com/_Downloads_/_vuDocker_/blob/vuKube/1.35.4/vuKube-k8s1.35.4-cis1.12-ubuntu-22.04-amd64.tar.gz
- https://download.vunetsystems.com/_Downloads_/_vuDocker_/blob/vuKube/1.35.4/vuKube-k8s1.35.4-cis1.12-ubuntu-24.04-amd64.tar.gz
Starting vuLauncher
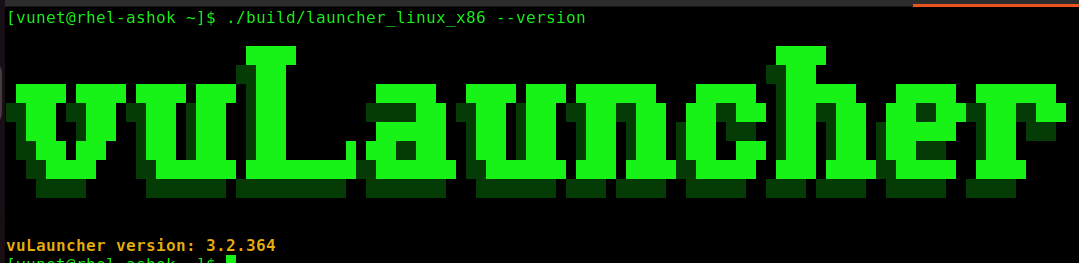
Verify the build version, before the start of the deployment - ./build/launcher_linux_x86 --version
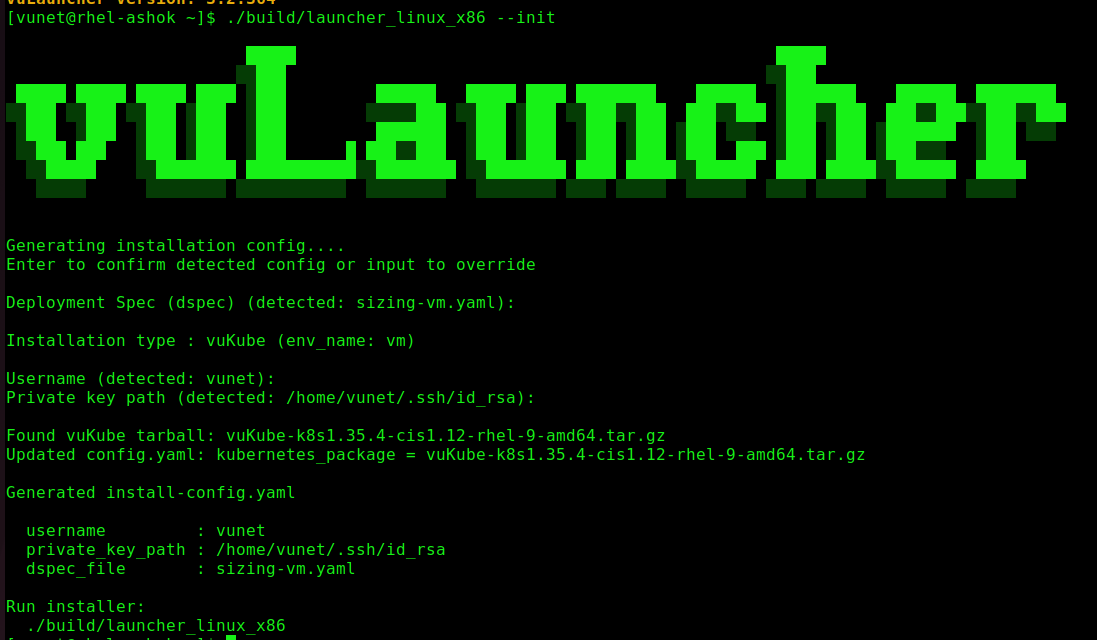
To start the vuLauncher, execute the following command - ./build/launcher_linux_x86 --init
- This will initiate the deployment for vuSmartMaps. It’ll auto detect username, private key, vukube package, and the Dspec file.
- Dspec is unique for an environment, update the d-spec details according to the deployment environment. Ensure that the Dspec file - should be in this format - sizing-vm.yaml
- Now, start the deployment using - ./build/launcher_linux_x86 --debug
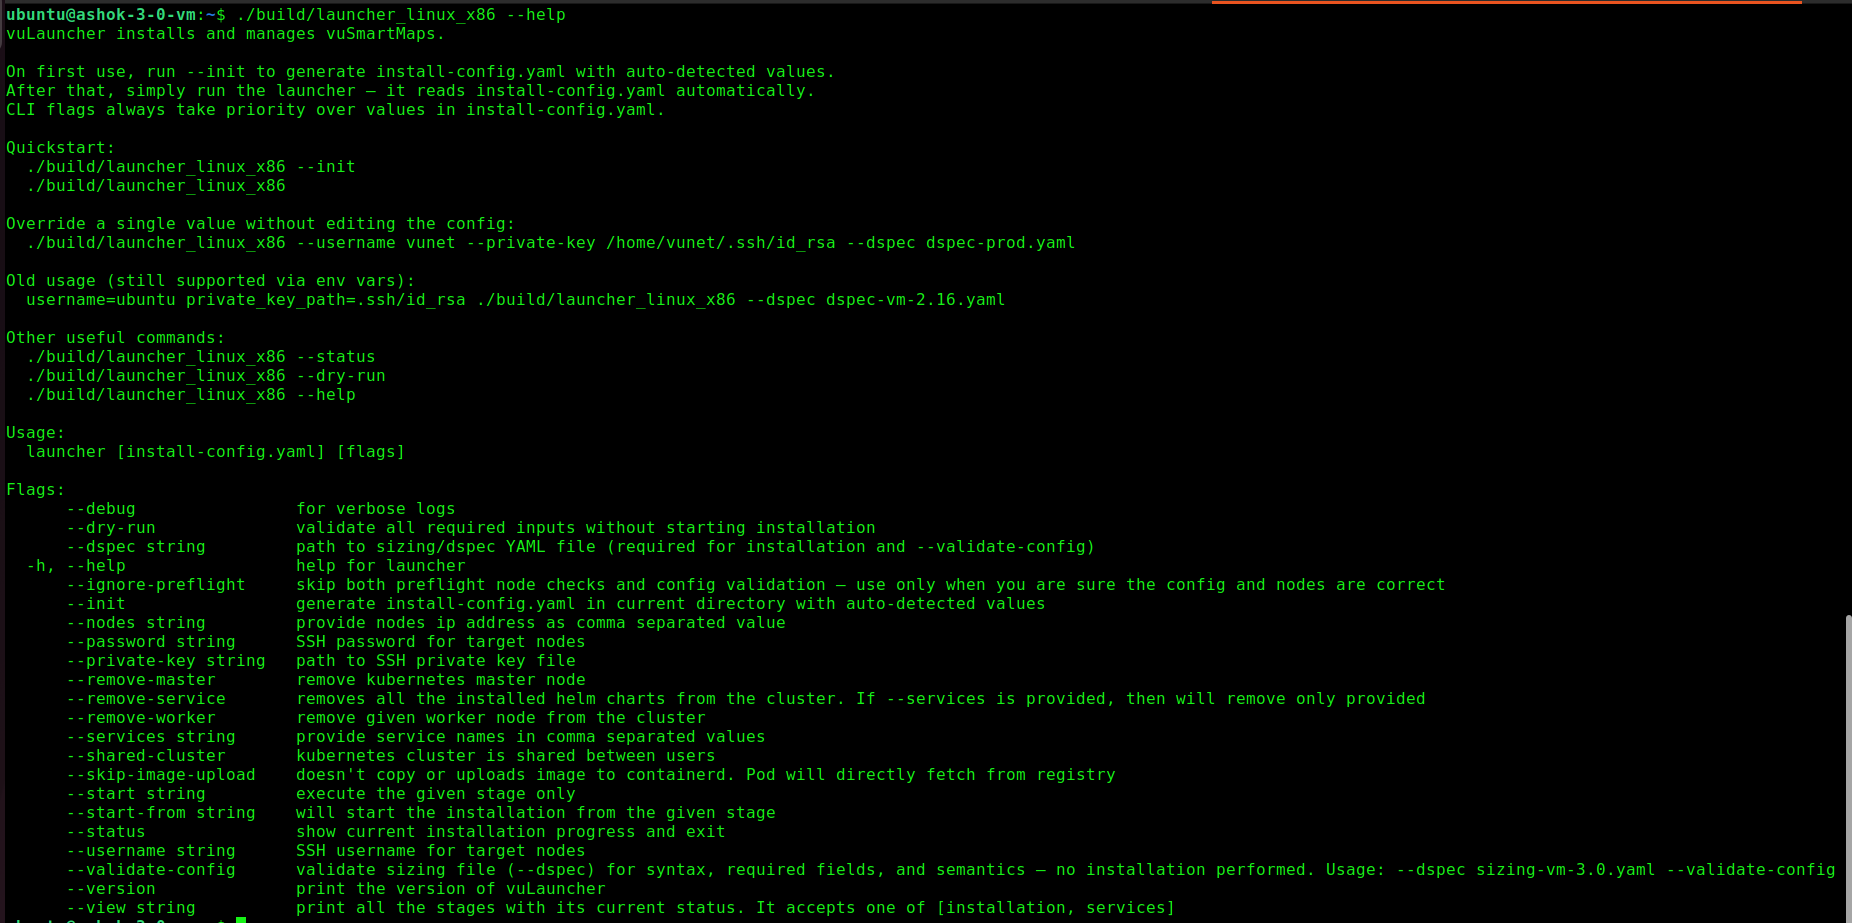
To get all the possible arguments that can be passed to the launcher binary can be found via “./build/launcher_linux_x86 - - help”
CLI Arguments
vuLauncher CLI arguments :
- -h — Prints help for the launcher.
- - - version — Prints the version of vuLauncher.
- - - init — Generates install-config.yaml with auto-detected values. Run this first before anything else.
- --validate-config — Validates the sizing file for syntax and required fields. No installation is performed.
- --dry-run — Validates all inputs without starting installation. Use as a final check before deploying.
- - - debug — Initiates the deployment of vuSmartMaps.
- --view installation — Prints all installation stages with their current status.
- --view services — Prints all installed Helm chart services and their status. Use to verify post-install health.
- --status — Shows the current installation progress and exits. Can be run at any time during or after installation to check which stages have completed.
- --log-level — Controls the verbosity of terminal log output. Accepted values: debug (shows all), info (default — shows INFO + WARN + ERROR), warn (shows WARN + ERROR only), error (shows ERROR only).
- --start — Executes only the given stage, rather than running the full installation.
- .--start-from — Starts the installation from the given stage onward, skipping earlier stages.
- --skip-hardening — Skips CIS hardening stages (apply-cluster-hardening, apply-gatekeeper, apply-network-policies).
- --skip-image-upload — Skips copying/uploading images to containerd; pods fetch images directly from the registry instead.
Launcher Workflow
When we start the launcher, we will validate all the configuration files (launcher config, d-spec). The entire workflow of the launcher is divided into the following stages
Launcher pre-flight stages
- This stage verifies the pre-requisites before the start of the actual launcher deployment. These checks includes are the pre-requisites as part of NG-3.2 Deployment Prerequisites & Prechecks Guide
Copying vuKube Package
- This stage copies the kubernetes package(depending on the OS) to all the available nodes in the d-spec.
- This tar file contains all the Kubernetes-related binaries, kubeadm scripts, and it’s related docker images.
Extract vuKube Package
- This extracts the kubernetes.tar.gz on all the nodes.
- Here launcher executes the bash command (tar -xvzf kubernetes.tar.gz) over an ssh connection
Create Soft Link
- This stage creates the soft link for containerd and kubelet.
- The launcher will choose the mount point-based preference: vusmart > default > hot > warm > cold > default-replica.
- Assuming the mount point chosen is /data, then:
- /var/lib/containerd -> /data/vunet/containerd
- /var/lib/kubelet -> /data/vunet/kubelet
Pease ensure that no softlinks are present before the installation.
Set Kernel Defaults
-
Configures the three kernel parameters required by Kubernetes on every node in the cluster, in parallel, before Kubernetes is installed.
The following parameters
| Parameter | Value | Purpose |
|---|---|---|
| vm.overcommit_memory | 1 | Enables always overcommit mode, allowing memory allocations to exceed the available physical memory/swap. This is commonly used for Kubernetes workloads that rely on memory overcommit behavior. |
| kernel.panic | 10 | Automatically reboots the node 10 seconds after a kernel panic, allowing the node to recover and rejoin the Kubernetes cluster. |
| kernel.panic_on_oops | 1 | Converts a kernel oops into a kernel panic, causing the kernel.panic=10 reboot behavior to be triggered instead of leaving the node running in a potentially inconsistent state. |
Master Node Setup
- This stage installs Kubernetes services in the master node. The master node will be identified in the d-spec, marked with is_master: true.
- For a multi-master set-up, provide is_master: true to the required nodes in the Dspec.
Worker Node Setup
- This stage will install Kubernetes in all the worker nodes. This installation will happen in parallel.
- If any of the worker nodes fail to get installed, then we will mark this as a failure.
Cluster Pre-Setup
- This stage contains the pre-installation tasks required before installing the actual helm charts. These tasks include:
- Creating node-labels and taints
- Creating a secret to pull docker images
- Executes preK8sManifest
Cluster Validation
- Once the Kubernetes cluster is successfully installed, we will validate it again to see that all the services are running correctly
Apply-cluster-hardening
- Applies CIS Kubernetes Benchmark Level 2 hardening across all cluster nodes. On the control plane, it rewrites the kube-apiserver, kube-controller-manager, and kube-scheduler static pod manifests to enforce CIS security flags (anonymous auth disabled, audit logging, TLS minimum version, encryption at rest). On each worker node, it hardens the kubelet configuration. After hardening, the upgrade waits for the API server to recover before proceeding.
Helm Chart Updates
- This stage will update all the helm-charts with the contents(resources & limits, PV Mapping details and any other manual config overrides) in the d-spec.
Apply-gatekeeper
- Installs Open Policy Agent (OPA) Gatekeeper as the cluster's policy enforcement engine. The phase loads Gatekeeper container images into containerd on the master and all worker nodes (air-gap safe), installs Gatekeeper via Helm, waits for pods to become ready, then applies all constraint templates and constraints from the bundle. Gatekeeper enforces security and compliance policies on all new and updated Kubernetes resources.
Apply-network-policies
- Applies a set of pre-defined Kubernetes NetworkPolicy resources from the bundle to enforce pod-level network segmentation across the cluster. These policies restrict traffic between namespaces and workloads, ensuring only explicitly permitted communication paths are allowed, aligned with CIS and zero-trust network requirements.
Service Installation
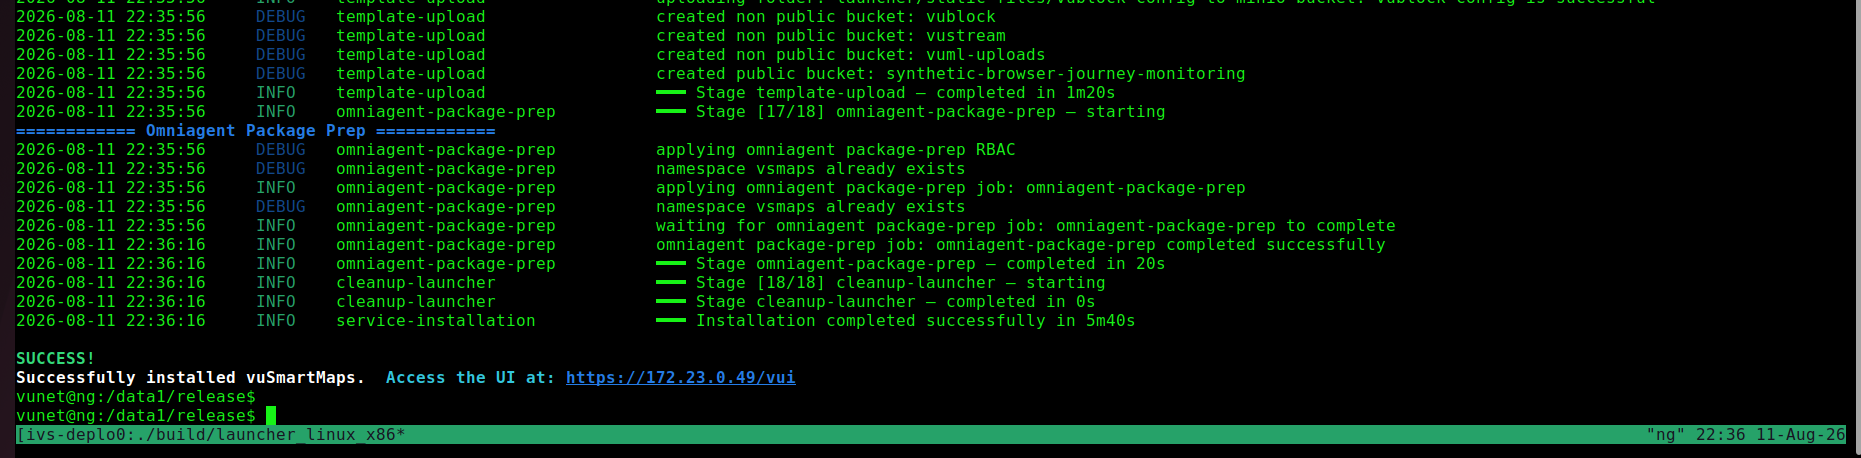
- This stage will install all the helm-charts for the services listed in the d-spec.
- Each helm-chart will have its dependent helm-charts specified in the values.yaml file, so the launcher will identify the correct order to install helm-chart.
- If any service helm-chart fails to get installed with an error, then all its parent helm-charts will be skipped.
Template Upload
- This stage handles uploading all the agent binaries, vublock, vustream templates, and other static-files to MinIO UI.
Omniagent Package Prep
- This stage handles preparing the jobs and configs required for omni-agent installation.
Post-deployment steps
- For non-production or internal test environments deployed in datahub
dnsnamemode, where a DNS server is not available, add the following entries to the/etc/hostsfile on the nodes sending data to vuSmartMaps (for example, OmniAgent nodes). Map the broker DNS names to the corresponding VM IP addresses. For example,
- x.x.x.x ( IP of any one broker VM) vunet-datahub.prod.mybank.com
- x.x.x.x ( IP of the broker VM1) vunet-datahub-0.prod.mybank.com
- x.x.x.x ( IP of the broker VM2) vunet-datahub-1.prod.mybank.com
This is generally not recommended for production env. The datahub deployment (dnsname/hostIP) at the time of installation is expected to match the agreed upon data collection approach with the customer. If the “dnsname” approach is agreed upon, the target environment is expected to have the required DNS entries created prior to installation. Refer to the prerequisites guide for more information.
Conclusion
This user guide outlines the systematic process for deploying vuSmartMaps NG-3.2, providing clear instructions to ensure a smooth and successful system deployment.
Key Takeaways
- Streamlined Installation of vuSmartMaps: vuLauncher is a dedicated application designed to simplify the installation of vuSmartMaps within VM-based environments. The user-friendly UI allows users to input essential details for efficient deployment.
- Comprehensive Deployment: This application encompasses key functionalities, including installing vuSmartMaps, controlling pipelines via Data Stream Orchestration, and deploying O11ySources using O11ySources Orchestration, providing a complete solution for system deployment.
- Prerequisites and Configuration: Ensure VMs meet prerequisites such as proper configuration, connectivity to SiteManager, and necessary command execution. Expose essential ports, set environment variables, and have uniform credentials across VMs.
- Step-by-Step Installation: The installation process involves starting SiteManager, uploading licenses, selecting the target VM platform, configuring VM SSH credentials, confirming mapping, customizing port configurations, and initiating the installation process.
- Efficient Mapping and Deployment: vuLauncher employs a resource-driven backtracking algorithm to optimally allocate services to available VMs. This ensures effective utilization of resources, with mapping confirmed and services deployed after smart allocation.
The streamlined process ensures smooth deployment of vuSmartMaps while optimizing resource utilization, paving the way for effective system operation.
