Accessing vuSmartMaps
Overview
Accessing vuSmartMaps explains how users log in to the vuSmartMaps platform and start using the homepage after successful authentication. It covers secure login using username or email, password, and captcha; Multi-Factor Authentication (MFA), if enabled; password reset; password change; sign out; and key homepage controls such as the left navigation menu, license expiry indicator, user-specific timezone, alert pop-ups, Customer Service Panel, and Recently Viewed Pages.
To use vuSmartMaps, users need a modern internet browser. Chrome Version 109 or higher is recommended. Authentication helps protect platform access by allowing only authorized users to enter the system. After successful login and authentication, users are redirected to their personalized homepage, where they can access platform modules, view recently visited pages, check license status, adjust timezone preferences, and manage user-specific alert pop-up settings.
Use this chapter when users need to log in to vuSmartMaps for the first time, complete MFA, understand OTP behavior or OTP errors, reset a forgotten password, change the current password, sign out securely, open the homepage, use the left navigation menu, check license expiry details, update user-specific timezone, configure alert pop-ups, access the Customer Service Panel, or reopen recently viewed pages.
For example, a NOC engineer starting a shift can log in to vuSmartMaps, complete MFA if required, and use the left navigation menu to open the required monitoring pages such as Alert Console. From the homepage, the engineer can also check license expiry status, confirm the user-specific timezone, and configure alert pop-ups for important alerts.
Comprehensive Understanding
Login Page
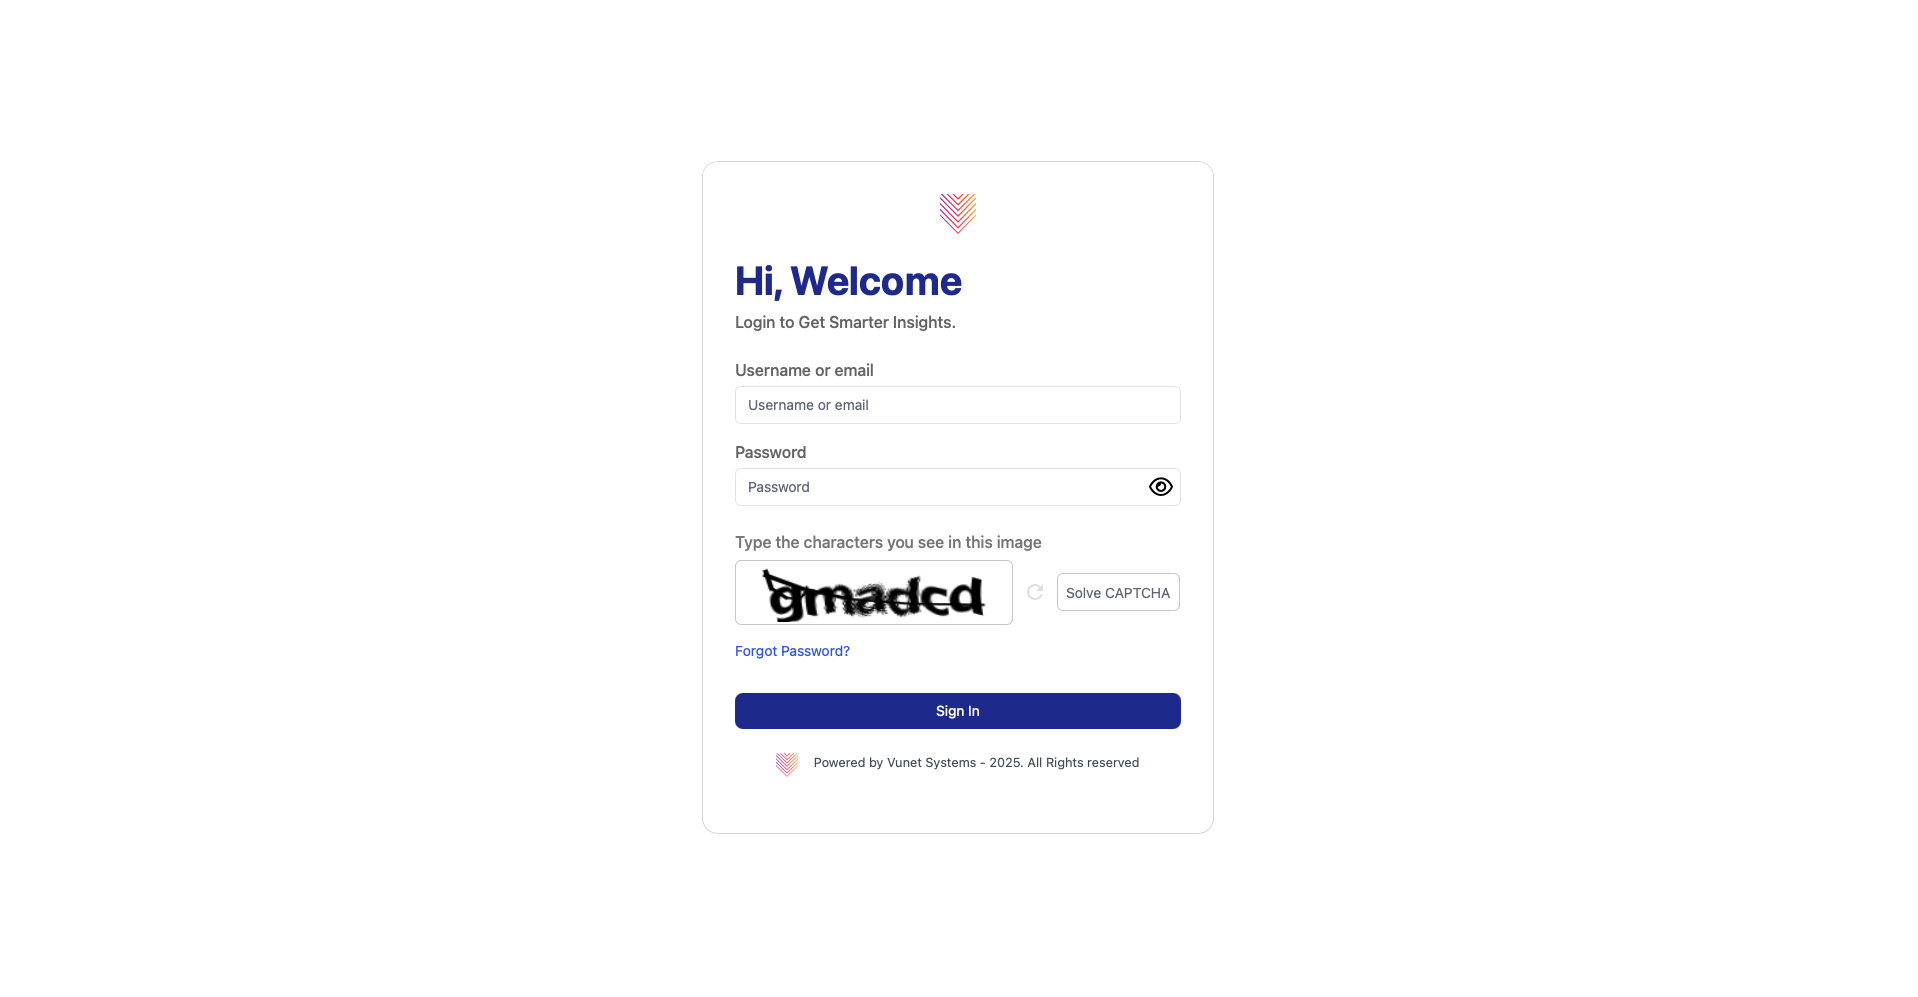
The login page is shown when users open the vuSmartMaps URL in the browser.
The URL format is: https://a.b.c.d/vui
Here, a.b.c.d represents the system IP address or domain name where vuSmartMaps is hosted.
The login page contains:
- Username or email
- Password
- Captcha
- Sign In button
- Forgot password? option
The Username, Password, and Captcha fields are mandatory. Username is case-insensitive. Password is case-sensitive. Captcha confirms that the user is human and helps prevent automated attacks and brute-force attempts.
Multi-Factor Authentication Page

After users enter the correct username and password, vuSmartMaps can show an authentication page if MFA is enabled.
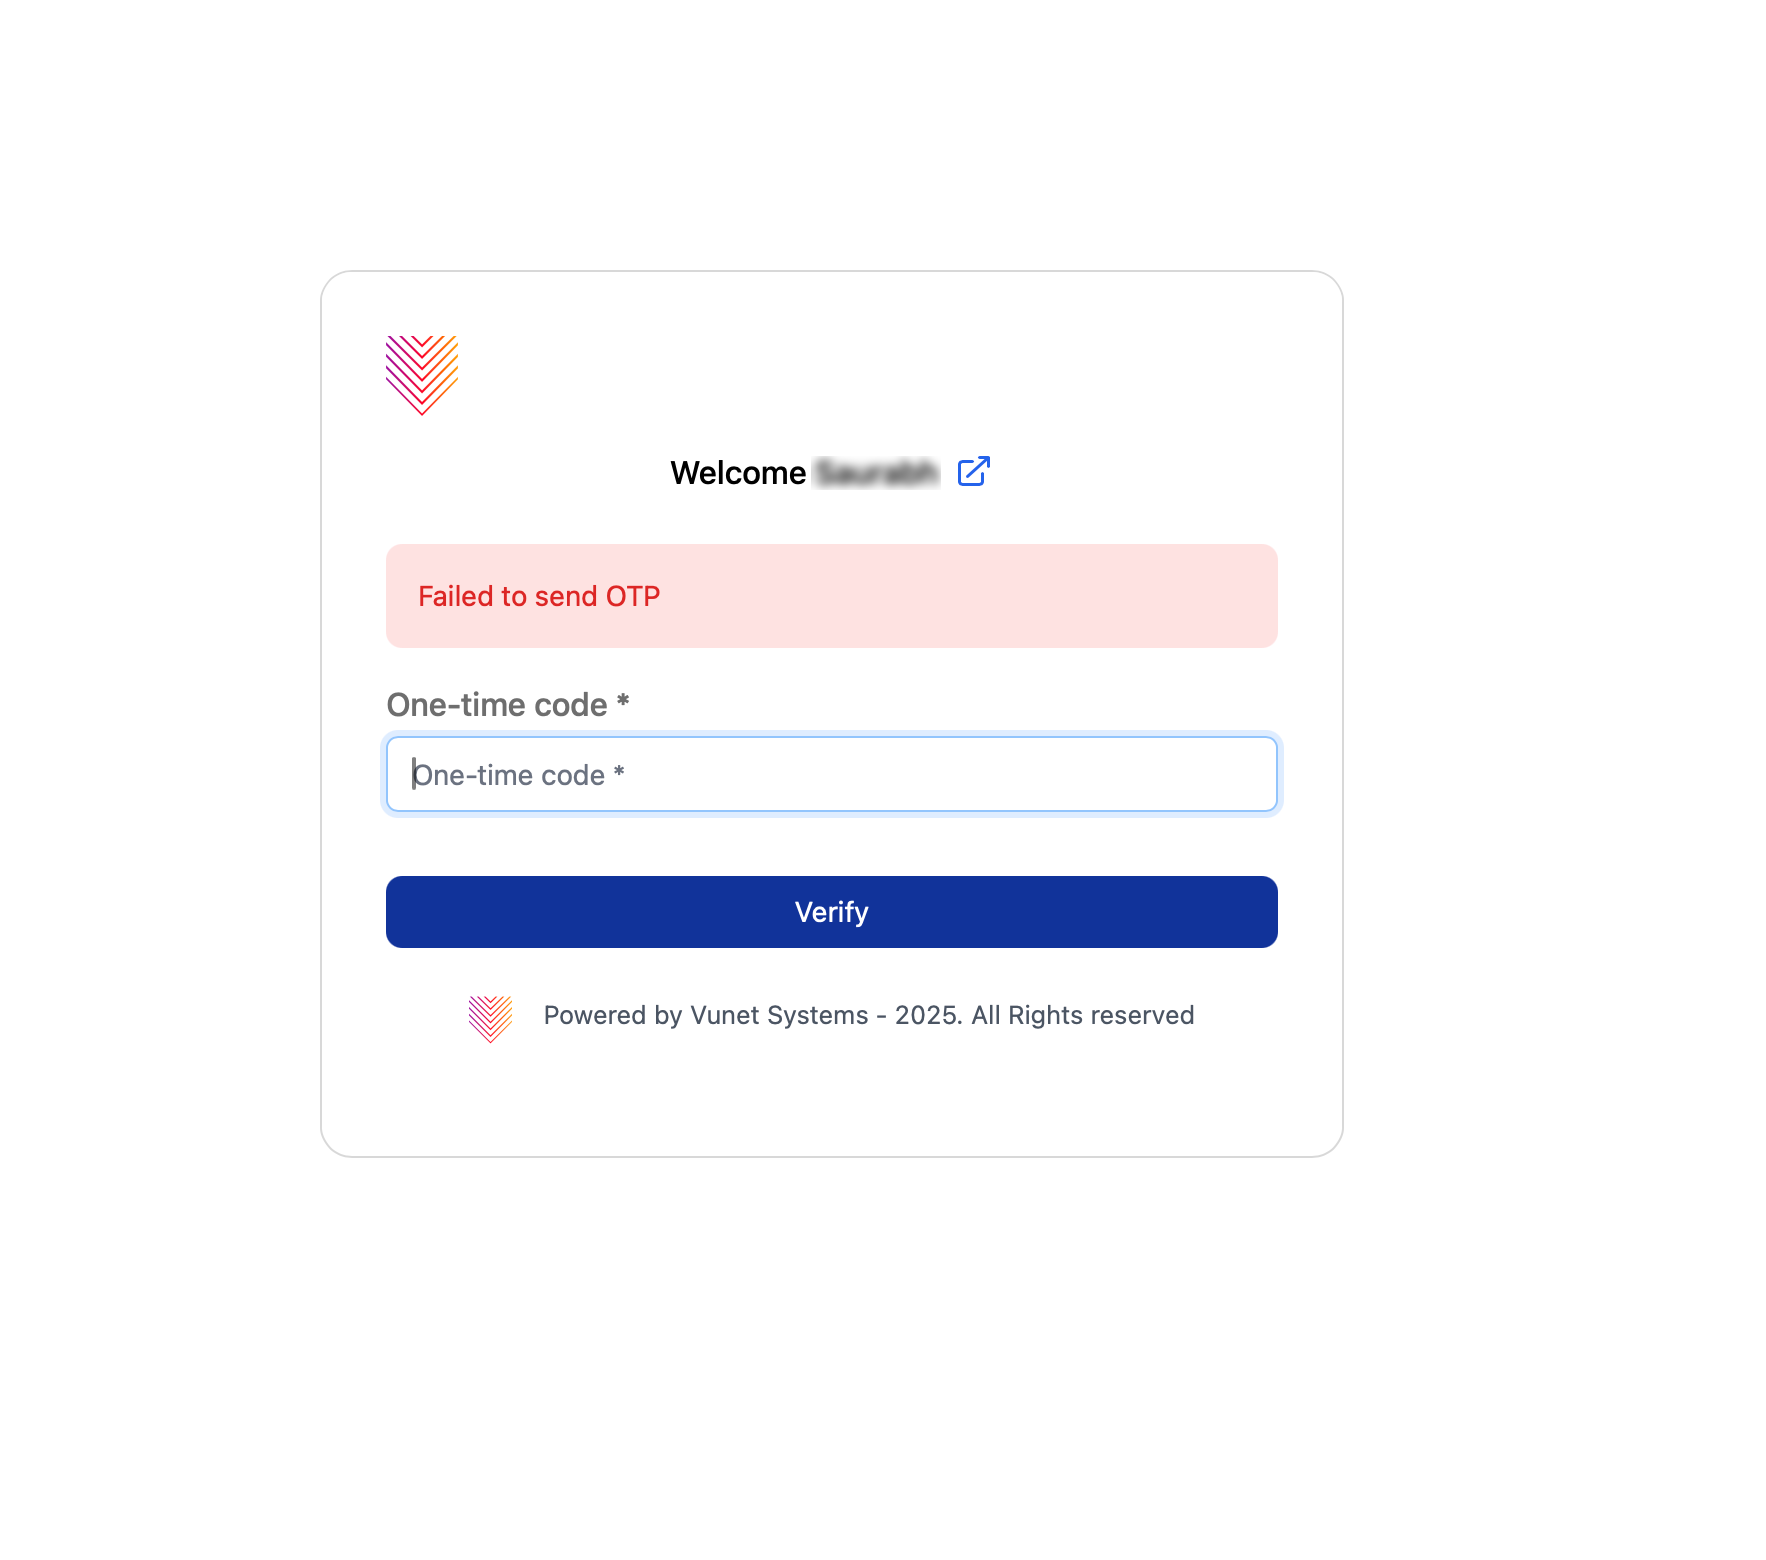
The MFA page contains:
- OTP input field
- Verify button
- Error messages such as Failed to send OTP or Invalid OTP
MFA adds an extra layer of security after password authentication.
Password Reset Pages
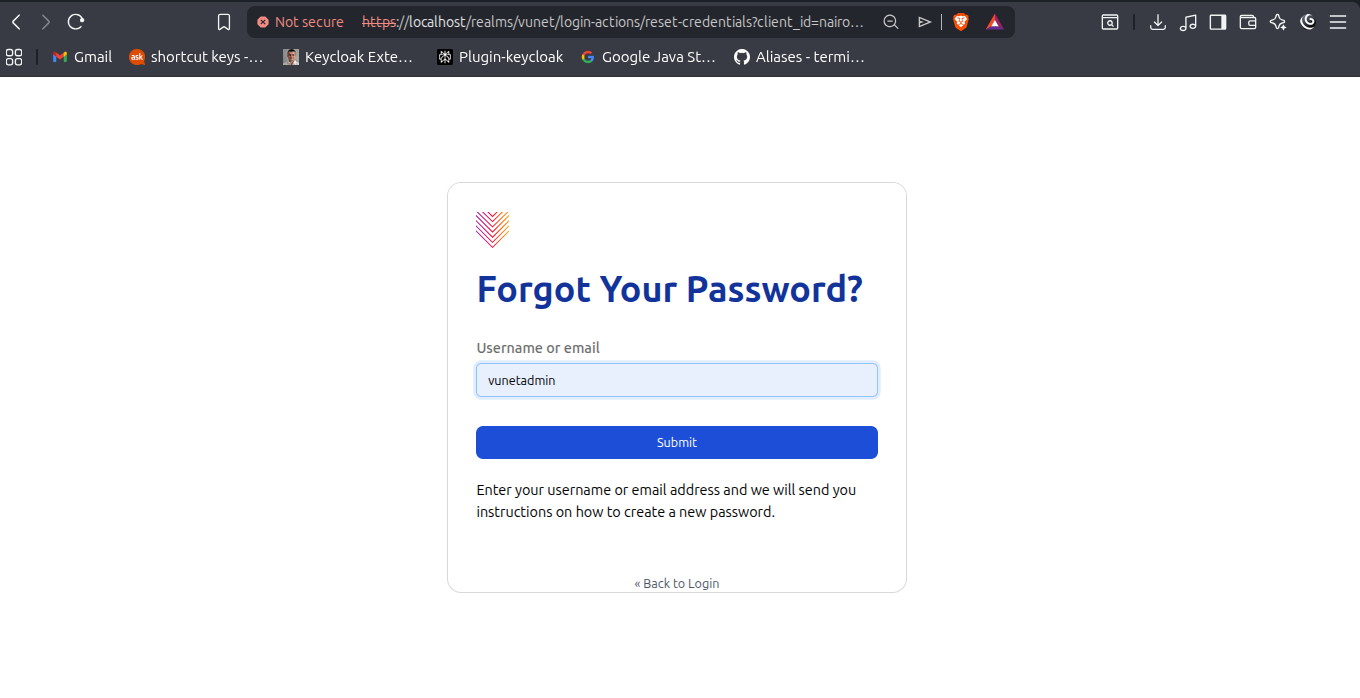
The password reset flow starts from the Forgot password? option on the login page. It includes:
- A page to enter username or email.
- A confirmation message after requesting reset instructions.
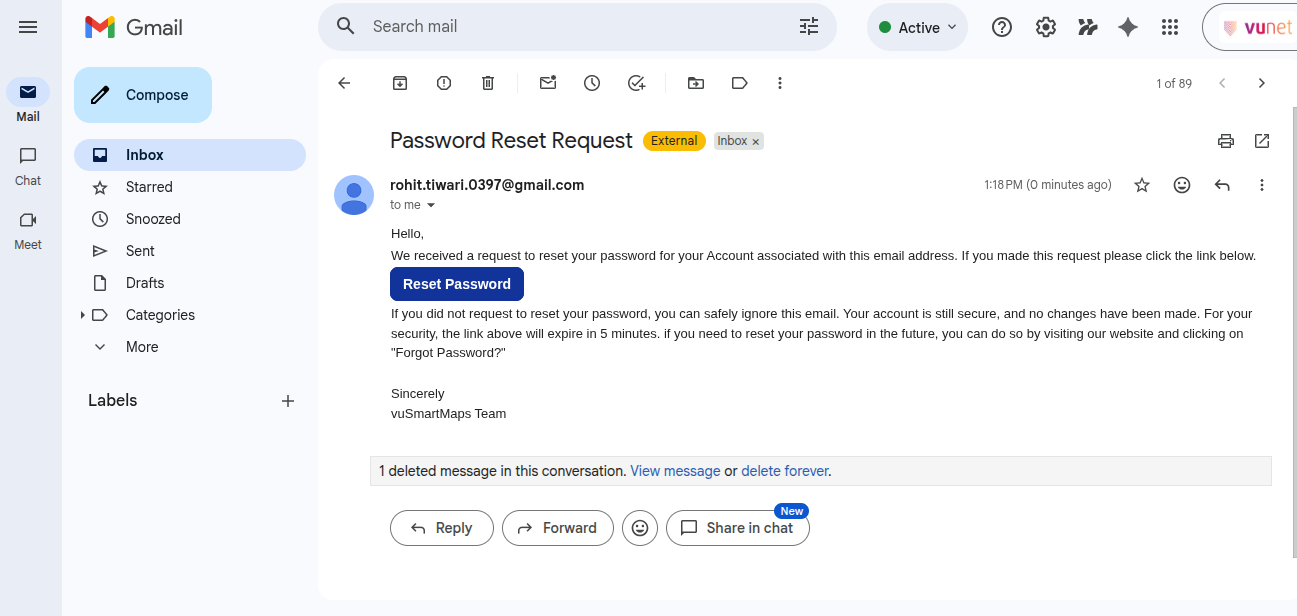
- A password reset email with a reset link.
- A page to enter and confirm a new password.
The reset link is valid for five minutes.
Change Password Page
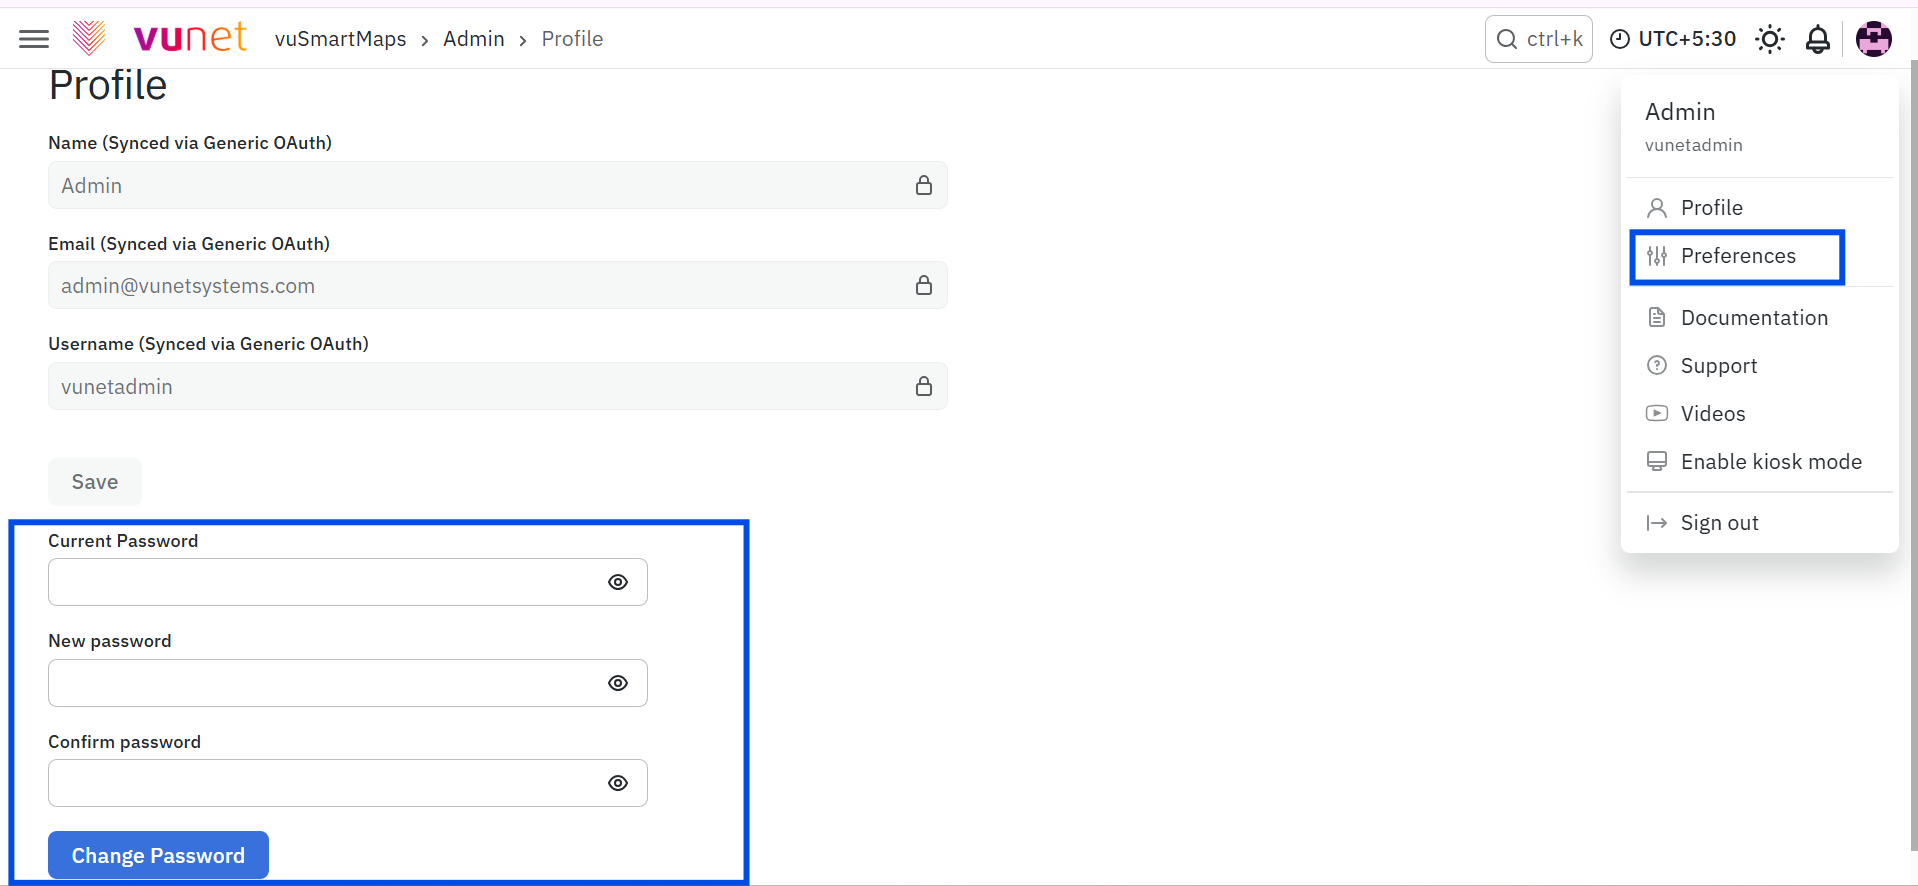
The Change password option is available from the Profile section in the top-right corner, if the administrator has granted permission. The page contains:
- Current password
- New password
- Confirm password
- Change Password button
vuSmartMaps Homepage
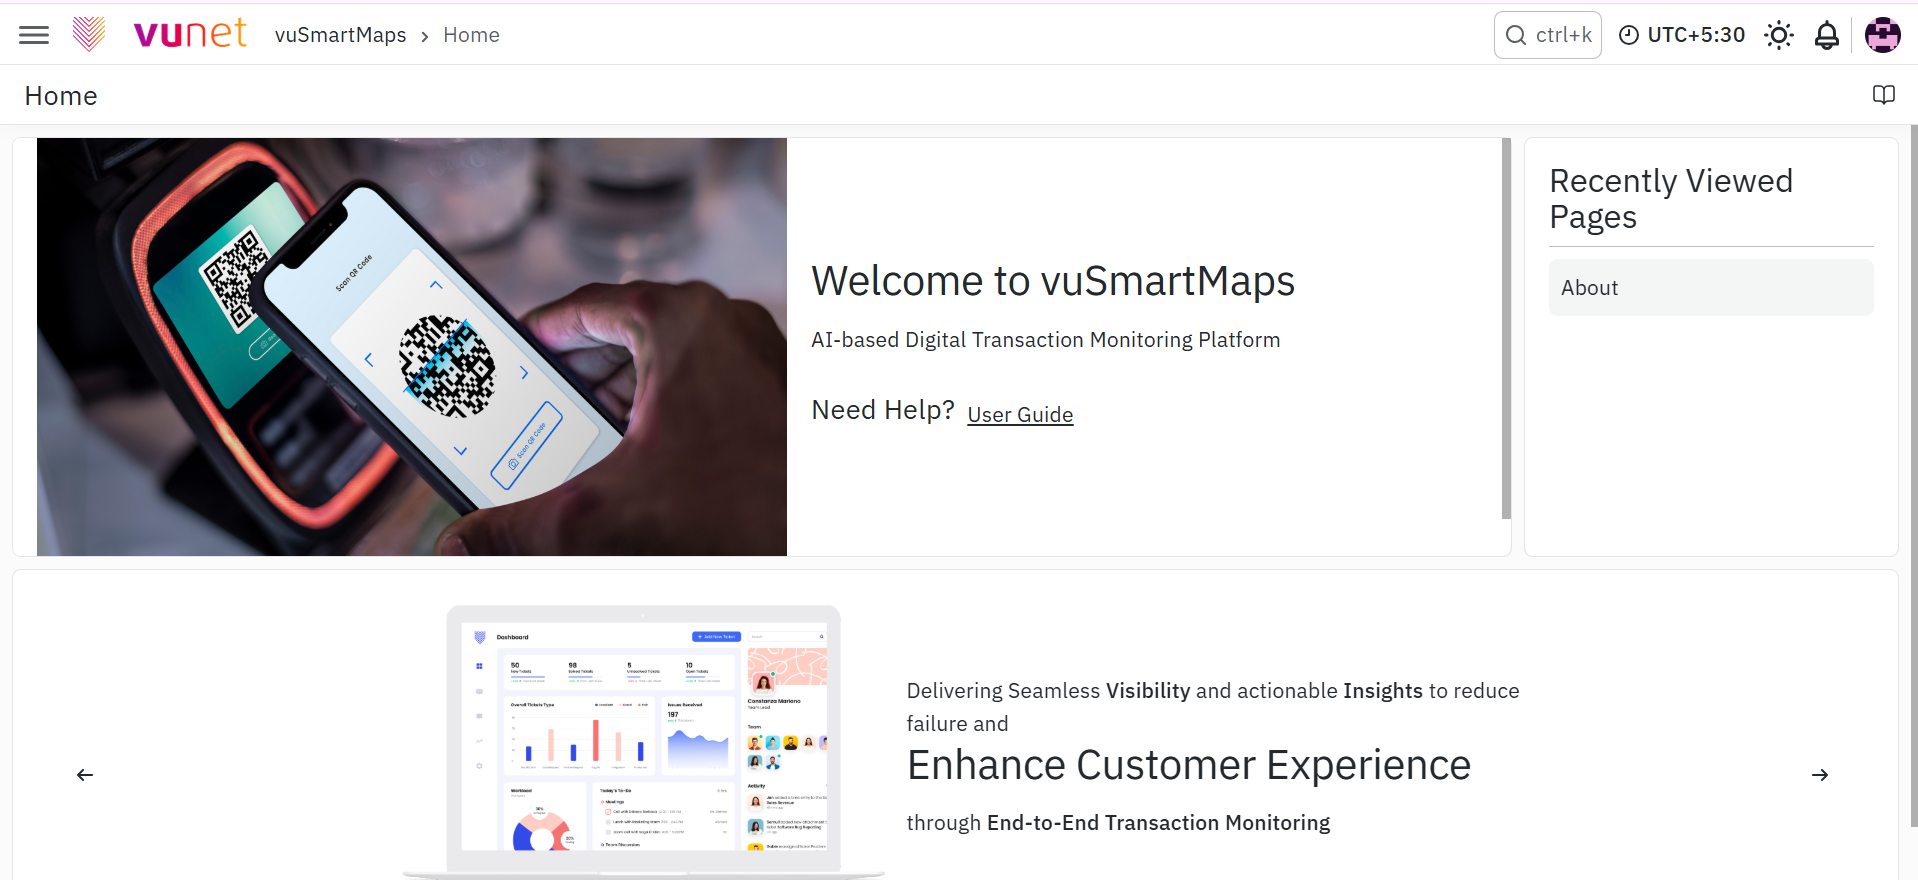
After successful login and authentication, users are redirected to the homepage. The homepage may differ from user to user based on dashboard requirements configured through User Management.
The homepage contains two main sections:
- Customer Service Panel
- Recently Viewed Pages
It also provides access to the left navigation menu and top-right user controls.
Left Navigation Menu
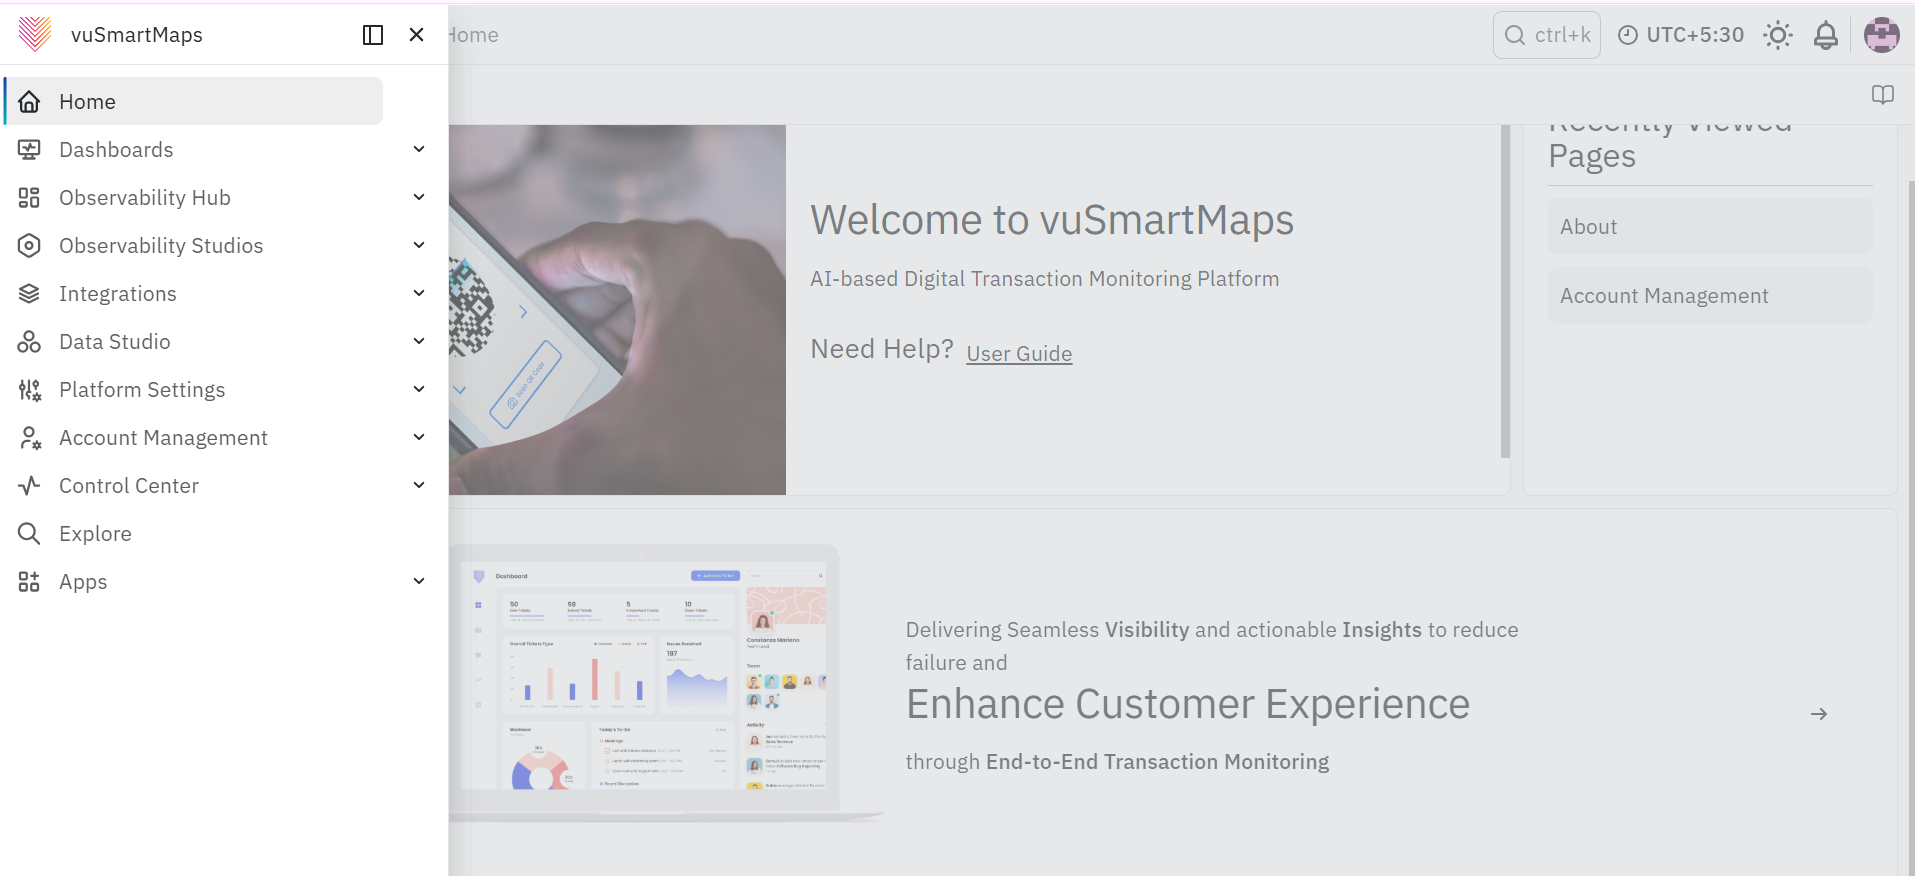
The Toggle Menu at the top-left opens the left navigation menu. It provides access to platform modules and features. Menu visibility can depend on user roles. Admin users have complete access to menu navigation. End users must contact the administrator for additional access.
The source document lists these menu areas:
- Home
- Dashboards
- Playlists
- Snapshots
- Library panels
- Observability Hub
- Alert Console
- Reports
- Data Explorer
- Application Performance Monitoring
- AI Explorer
- Smart-Frames
- Observability Studios
- Notification Studio
- Alert Configuration Studio
- Reports Studio
- UTM Studio
- Insights Studio
- Mobile Dashboards Studio
- AI/ML Modelling Workspace
- Data Modelling Workspace
- AI Studio
- Smart-Frame Studio
- APM Studio
- Integrations
- O11ySources
- Application Workbench
- Data Studio
- Tables & Data Storage
- Data Retention
- Data Sources
- Data Enrichment
- ContextStreams
- Host Landscape
- Extract Data
- SNMP Definitions
- Platform Settings
- Definitions
- Platform Configurations
- User Federation
- Resource Manager
- Plugin Manager
- API Identities
- Account Management
- Identity & Access
- License Manager
- About
- Control Center
- Alert Policies
- System Console
- Notification Routing
- Explore
- Apps
- vuSmartMaps
- vuCoreML
- vuLogDna
License Expiry Indicator

The License Manager page provides a consolidated view of license validity, license consumption, and the limits assigned to different vuSmartMaps components. To access this page, navigate to Account Management > License Manager. The page helps users review the remaining license duration, monitor current usage against licensed limits, and identify components that are approaching or exceeding their permitted usage.
License Validity
The License Validity section displays the number of days remaining before the license expires, along with the exact expiry date and time. The circular indicator changes color based on the remaining validity period:
- Green: More than 90 days remaining.
- Blue: 61 to 90 days remaining.
- Yellow: 31 to 60 days remaining.
- Pink: 30 days or fewer remaining.
This section helps users track the license expiry status and plan license renewal before access is affected.
License Usage
The License Usage section shows the overall license consumption status. The circular indicator displays the current usage state and a message explaining whether the usage is within the licensed limits.
The usage status is represented using the following colors:
- Green – Normal: Usage is below 90% of the licensed limit.
- Blue – Impending: Usage is 90% or more but below 100% of the licensed limit.
- Yellow – Crossed: Usage is 100% or more but below 110% of the licensed limit.
- Pink – Breached: Usage is 110% or more of the licensed limit.
These indicators help users identify when license consumption is approaching, crossing, or exceeding the configured limits.
Component-wise License Details
The right side of the page displays license information for the enabled vuSmartMaps components. Each component section shows its current status and provides the following details:
- Component: Displays the resource or capability controlled by the license.
- Limit: Displays the maximum licensed value assigned to the component.
- Usage: Displays the current value consumed against the licensed limit.
The page can display license details for components such as vuInfra360, vuLogX, vuBJM, vuRemoteInsights, and Utility. Depending on the component, the licensed resources may include servers, network components, availability monitors, configuration collectors, NetFlow instances, daily log ingestion, journeys, applications, infrastructure nodes, transactions, synthetic monitors, execution frequency, locations, and users. An Enabled label indicates that the corresponding component is included in the active license. Where a limit value is not available, the page may display NaN in the Limit column.
Upload License
The Upload License option is available in the upper-right corner of the page. It allows an authorized user to upload a license file and update the licensing information available in vuSmartMaps. After the license is updated, the validity, usage status, enabled components, and assigned limits are reflected on the License Manager page.
User-Specific Timezone
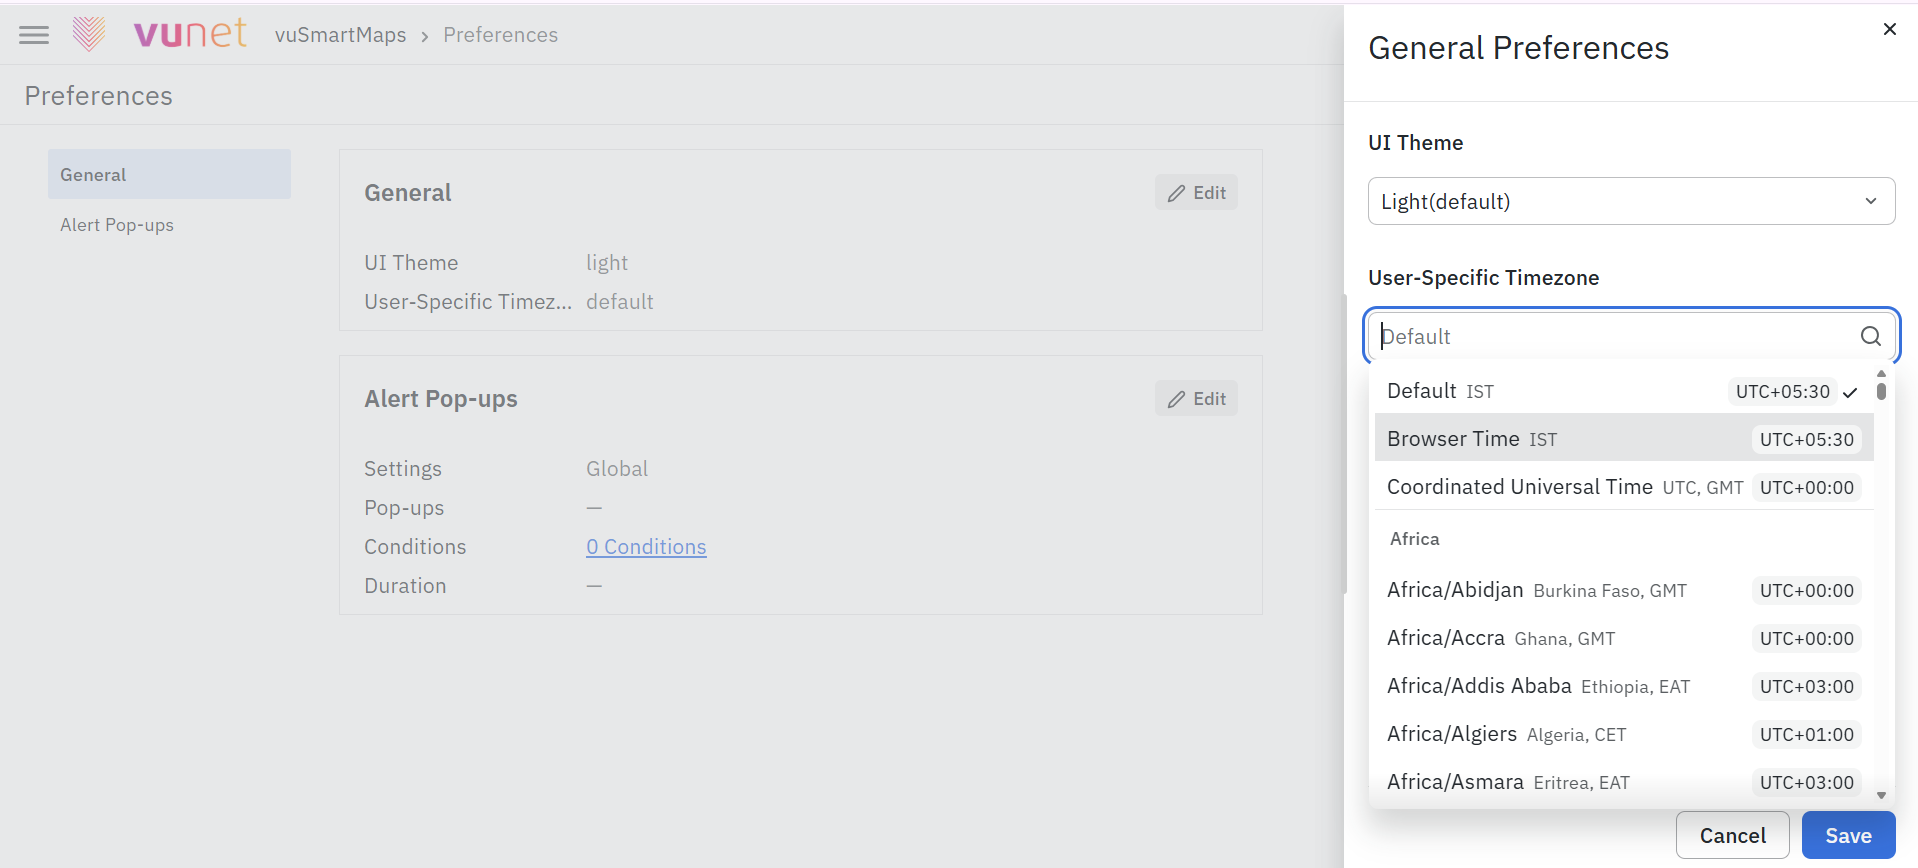
The user-specific timezone icon appears at the top-right corner. It shows the timezone set in the user profile. Users can change the timezone from Preferences. By default, it is set to Default. The selected timezone is displayed in the top-right corner of all pages. The user-specific timezone controls how timestamp and datetime fields appear in the UI.
Alert Pop-ups
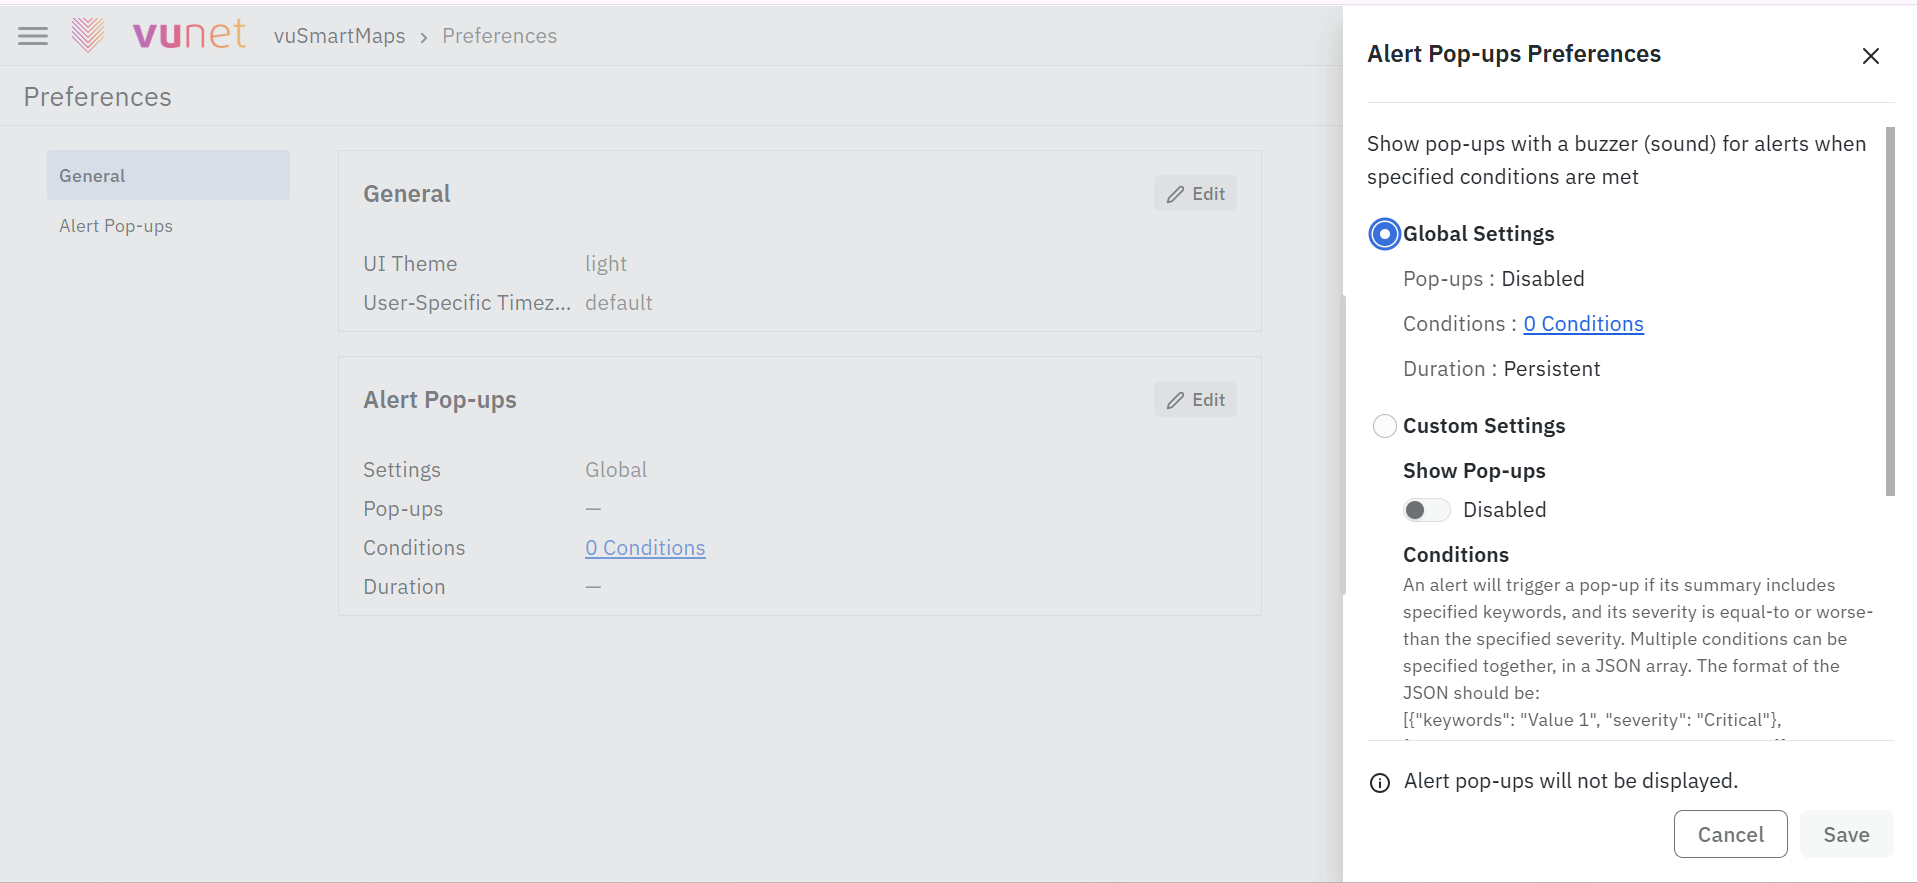
Alert Pop-ups show real-time alerts with a buzzer sound. They help users notice critical system events quickly. Alert Pop-up settings covered in this document are user-specific settings. Global preferences are managed from Platform Configurations. Users can open user-specific Alert Pop-up settings from the top-right Admin section by going to Preferences > Alert Pop-ups.
The settings include:
- Global Settings
- Custom Settings
- Conditions
- Severity levels
- Duration
- Save
Global Settings applies global configurations. Custom Settings allows the user to override global settings and define user-specific alert pop-ups.
Customer Service Panel
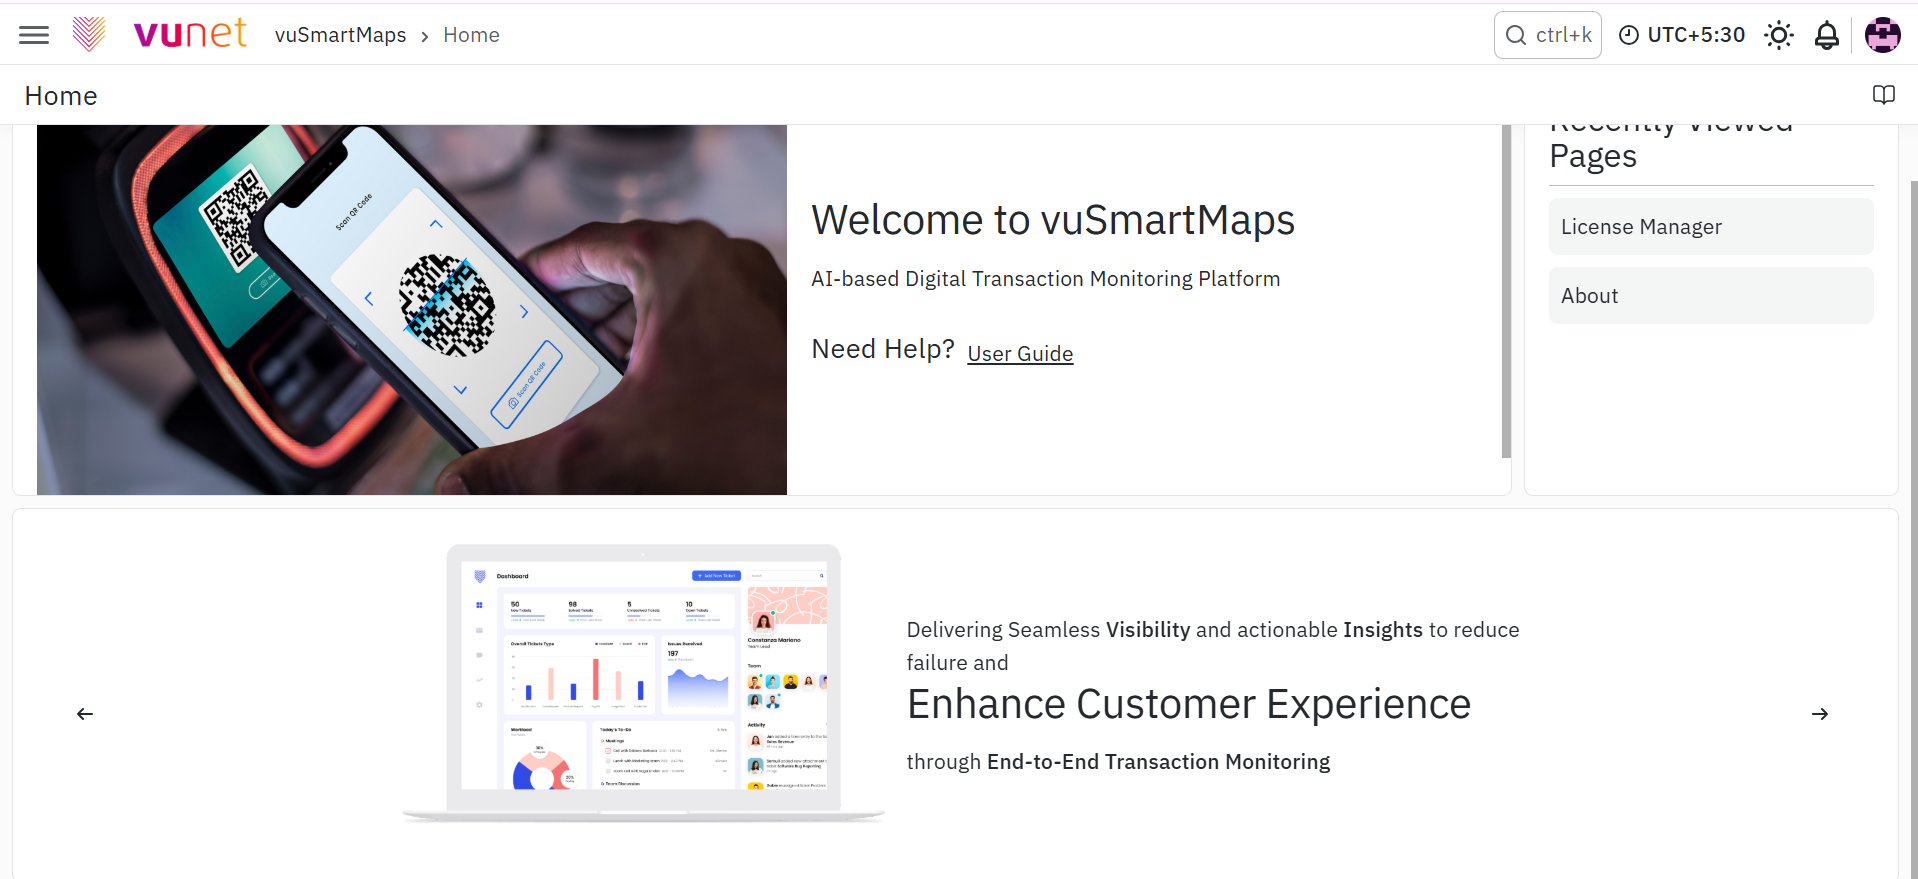
The Customer Service Panel on the homepage provides access to helpful resources. The source document specifically mentions: User Guide
Recently Viewed Pages
Recently Viewed Pages shows the latest five pages visited by the logged-in user. This list is user-specific and helps users reopen pages without searching for them again.
Step-by-Step Instructions
Log in to vuSmartMaps
- Open Chrome Version 109 or higher.
- Enter the vuSmartMaps URL in this format:
https://a.b.c.d/vui - On the login page, enter the Username or email.
- Enter the Password.
- Enter the Captcha.
- Click Sign In.
- After clicking Sign In, the system takes the user to the authentication page if MFA is enabled.
- After successful authentication, the user is redirected to the homepage.
Complete MFA Using SMS or Email OTP
- Enter the correct username, password, and captcha.
- Click Sign In.
- The system sends a One-Time Password by SMS or email to the registered contact information.
- Enter the OTP within the allowed time frame.
- Click Verify.
- If the OTP is valid, the vuSmartMaps homepage opens.
- If the OTP is invalid, the screen displays Invalid OTP.
- If the OTP is entered incorrectly three times, it expires.
- If the OTP is not used within the assigned time, it expires.
- After multiple incorrect attempts, request a new OTP.
The OTP expiration time and the limit for incorrect attempts can be configured by the admin in MFA settings.

Handle OTP Sending Failure
If OTP sending fails, the screen displays: Failed to send OTP
OTP sending can fail when:
- The OTP server is unavailable or down.
- The server fails to send the OTP to the registered mobile number or email.
If this happens, try again after some time or contact the administrator.
Complete MFA Using an Authenticator App
- Enter the correct username, password, and captcha.
- Click Sign In.
- Open the configured third-party authenticator app.
- Use the OTP generated by the app.
- Enter the OTP in vuSmartMaps.
- Click Verify.
- If the OTP is valid, the homepage opens.
Authenticator app OTPs do not expire like SMS or email-based OTPs. Examples of authenticator apps mentioned in the source document are:
- Google Authenticator
- Microsoft Authenticator
Understand Authentication Configuration
Authentication in vuSmartMaps is configurable. Organizations can enforce security policies based on their needs.The authentication setup includes:
- User Credential Verification: Username and password are validated against the system authentication service.
- MFA Activation: If MFA is enabled, users must authenticate with an additional factor such as SMS/email OTP or authenticator app OTP.
- OTP Configuration: Admins can adjust OTP expiration times and retry limits. SMS/email delivery failures are shown to users. Authenticator app OTPs remain valid without expiration constraints.
- Session Management: After successful authentication, a secure session token is issued to maintain access during the session.
- Error Handling and Alerts: Users are notified about invalid OTP attempts and can request a new OTP if needed.
If Captcha or MFA is not visible or enabled on the login screen, contact the system administrator. These features are configurable and may be enabled or disabled based on the organization's security policies.
Reset a Forgotten Password
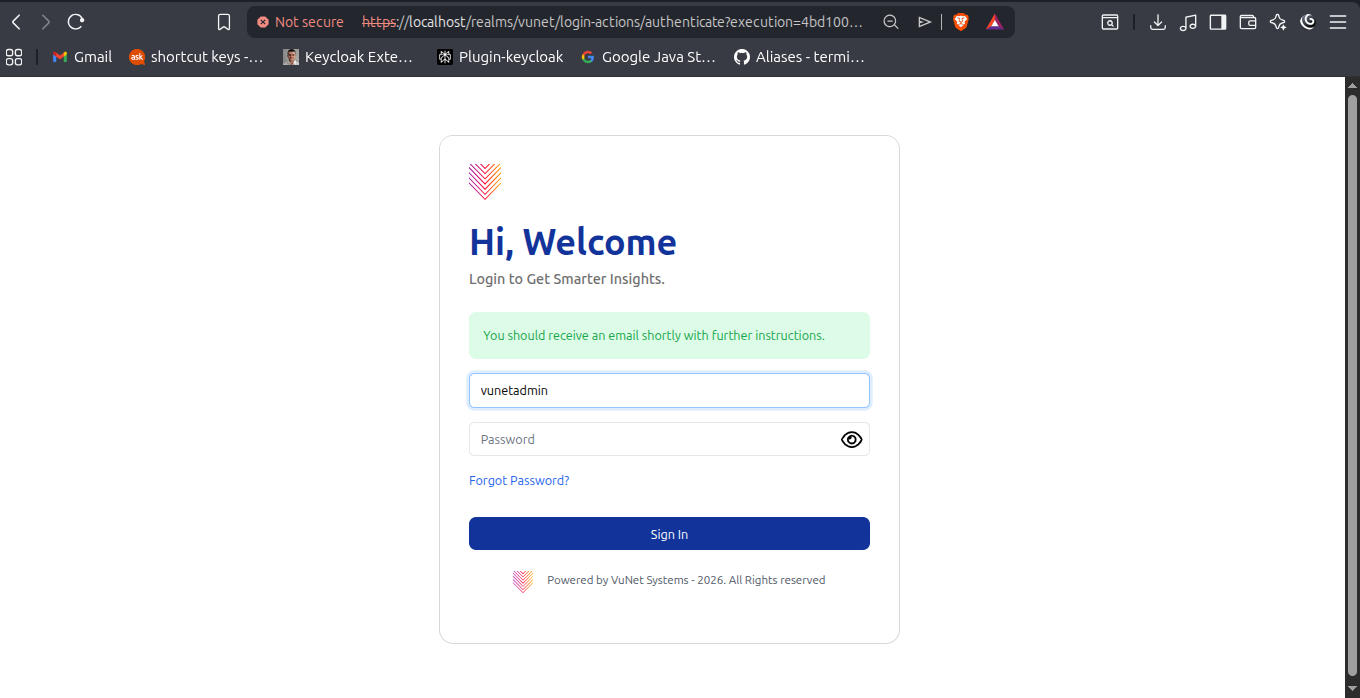
- Go to the login page.
- Click Forgot password?.
- Enter the username or email address.
- Submit the request.
- A confirmation message appears at the top, indicating that an email with reset instructions has been sent.
- Open the email and click the password reset link.
- Enter the new password.
- Re-enter the new password to confirm it.
- Click Submit.
- After submitting, the password is reset.
- The system redirects the user to the login page.
The password reset link is valid for five minutes.
Configure SMTP for Password Reset Emails
This section is for administrators only.
NG vuSmartMaps uses Keycloak for Identity and Access Management. Password reset emails are handled through Keycloak. To allow users to receive password reset links through the Forgot password? option, an SMTP server must be configured in Keycloak. If Gmail is used as the SMTP provider, a Gmail App Password is required when 2-Step Verification is enabled.
To configure SMTP with Gmail:
- Enable 2-Step Verification in Gmail.
- Go to
myaccount.google.com. - Open the Security section.
- Enable 2-Step Verification, if it is not already enabled.
- Go to
myaccount.google.com/apppasswords. - Sign in if prompted.
- Under App name, enter Keycloak.
- Click Create.
- Copy the 16-character App Password immediately. It will not be shown again.
- Log in to the Keycloak Admin Console.
- Select the required realm. The source document gives
vunetas an example. - Go to Realm Settings > Email.
- Configure these fields:
- From:
yourname@gmail.com - Host:
smtp.gmail.com - Port:
587 - Enable StartTLS: ON
- Username:
yourname@gmail.com - Password: Use the 16-character App Password generated earlier.
- From:
- Click Save before testing the connection.
- After saving, click Test Connection to verify the SMTP configuration.

The Test Connection option remains unavailable until the email configuration is saved.
Change Password
- Go to the top-right corner of the platform.
- Open the Profile section.

- Go to Change password.
- Enter the Current password.
- Enter the New password.
- Confirm the new password.
- Click Change Password.
This helps confirm the authenticity of the request and improves security. Users can change the password only if the administrator has granted permission. The system administrator can disable password change functionality for end users.
Access the Homepage
- Open the left navigation menu.
- Go to App > vuSmartMaps.
- Click vuSmartMaps.
- The homepage opens.
The homepage may differ by user based on user-specific dashboard requirements. This configuration is managed through User Management.
Use the Left Navigation Menu
- Click the Toggle Menu at the top-left corner.
- Review the list of available menu items.
- Click the required module or feature.
- The selected page opens.
Menu access is based on user roles. Admin users have complete access. End users should contact the administrator for additional access.
View License Expiry Details

- Check the top-right area of the top bar.
- If the license is within 90 days of expiry, the license expiry indicator appears.
- Click the indicator.
- A pop-up opens with detailed license expiry information.
- Use the color indicator to understand urgency:
- Yellow: 46 to 90 days remaining.
- Amber: 45 or fewer days remaining.
- Click the blue arrow in the pop-up to open the License Management page.
Change User-Specific Timezone
- Go to the top-right corner.
- Open Preferences.
- Open the user-specific timezone setting.
- Select the desired timezone from the User Specific Timezone dropdown.
- Click Save.
- The selected timezone appears in the top-right corner of all pages.

By default, the user-specific timezone is set to Default. All timestamp and datetime fields shown in the UI are displayed according to the selected user-specific timezone.
Configure Alert Pop-ups

- Go to the top-right Admin section.
- Click Preferences.
- Select Alert Pop-ups.
- The user-specific Alert Pop-ups settings modal opens.
- Choose one of the configuration options:
- Select Global Settings to apply global configurations.
- Select Custom Settings to define user-specific settings and override global settings.
- If using Custom Settings, enable Custom Settings. This must be enabled for pop-ups to work.
- Define conditions for triggering pop-ups based on severity levels.
- Enter conditions in JSON format.
- Set the duration:
- Persistent: Pop-up remains visible until manually dismissed.
- Timeout: Pop-up closes automatically after the defined duration.
- Click Save.
- A toast message confirms: Alert Pop-Ups configuration updated!
By default, the Global Settings Alert Pop-Ups option is disabled. To use global settings, ensure that Alert Pop-ups are enabled in Platform Configurations.
By default, the Custom Settings Pop-Up option is disabled. Users must enable it manually to receive alert notifications.
Example JSON format:
{"keywords": "IMPS, not found", "severity": "Critical"},
{"keywords": "Delay, timeout", "severity": "Error"}
Supported severity levels are:
- Critical: Red
- Error: Orange
- Warning: Yellow
- Information: Green
Use the Customer Service Panel
- Open the vuSmartMaps homepage.
- Locate the Customer Service Panel.
- Use the available link to open the User Guide.
Use Recently Viewed Pages
- Open the vuSmartMaps homepage.
- Locate the Recently Viewed Pages section.
- Review the latest five pages visited.
- Click a page name to revisit it.
Recently viewed pages are specific to the logged-in user.
If MFA or Captcha is not visible, the feature may not be enabled for the organization. Users should contact the system administrator.
If the homepage differs between users, it may be due to user-specific dashboard requirements configured through User Management.
Sign Out
- Go to the top-right corner of the platform.
- Click Sign out.
- The user is signed out of the platform.
Troubleshooting
-
Issue: Login page does not accept credentials.
- Possible cause: Username, password, or captcha may be incorrect.
- Solution: Re-enter all mandatory fields. Remember that username is case-insensitive, but password is case-sensitive.
-
Issue: Captcha or MFA is not visible on the login screen.
- Possible cause: Captcha or MFA may not be enabled for the organization.
- Solution: Contact the system administrator. These features are configurable and may be enabled or disabled based on organizational security policies.
-
Issue: Password reset email is not received.
- Possible cause: SMTP may not be configured correctly in Keycloak.
- Solution: Admin should configure SMTP settings in Keycloak and test the connection after saving the email configuration.
-
Issue: Test Connection is unavailable in Keycloak email settings.
- Possible cause: Email configuration has not been saved.
- Solution: Click Save first. Then use Test Connection.
-
Issue: Alert pop-ups are not appearing.
- Possible cause: Custom Settings may be disabled, or global Alert Pop-ups may not be enabled in Platform Configurations.
- Solution: Enable Custom Settings for user-specific pop-ups. For global settings, ensure Alert Pop-ups are enabled in Platform Configurations.
FAQs
Which browser should be used to access vuSmartMaps?
vuSmartMaps requires a modern internet browser. The document recommends using Chrome Version 109 or higher.
What is the URL format for accessing vuSmartMaps?
The vuSmartMaps URL is usually in this format:
https://a.b.c.d/vui
Here, a.b.c.d represents the system IP address or domain name where vuSmartMaps is hosted.
What details are required to log in?
Users must enter the Username or email, Password, and Captcha on the login page. All three fields are mandatory.
What is MFA in vuSmartMaps?
Multi-Factor Authentication (MFA) adds an extra security step after username and password verification. Users must verify their identity using an OTP through SMS/email or an authenticator app.
How can I reset my password?
On the login page, click Forgot password?, enter the username or email, and follow the reset instructions sent by email. The password reset link is valid for five minutes.
Why am I not receiving the password reset email?
Password reset emails are handled through Keycloak. If users are not receiving reset emails, the SMTP server may not be configured correctly. An administrator must configure SMTP in the Keycloak Admin Console.
What does the License Expiry Indicator show?
The License Expiry Indicator appears 90 days before license expiry on the top-right side of the top bar. It uses yellow for 46 to 90 days remaining and amber for 45 or fewer days remaining. Clicking the blue arrow in the pop-up opens the License Management page.
